
A new way to experience Twitch.tv on mobile
To improve my React native skills and learn various other tech
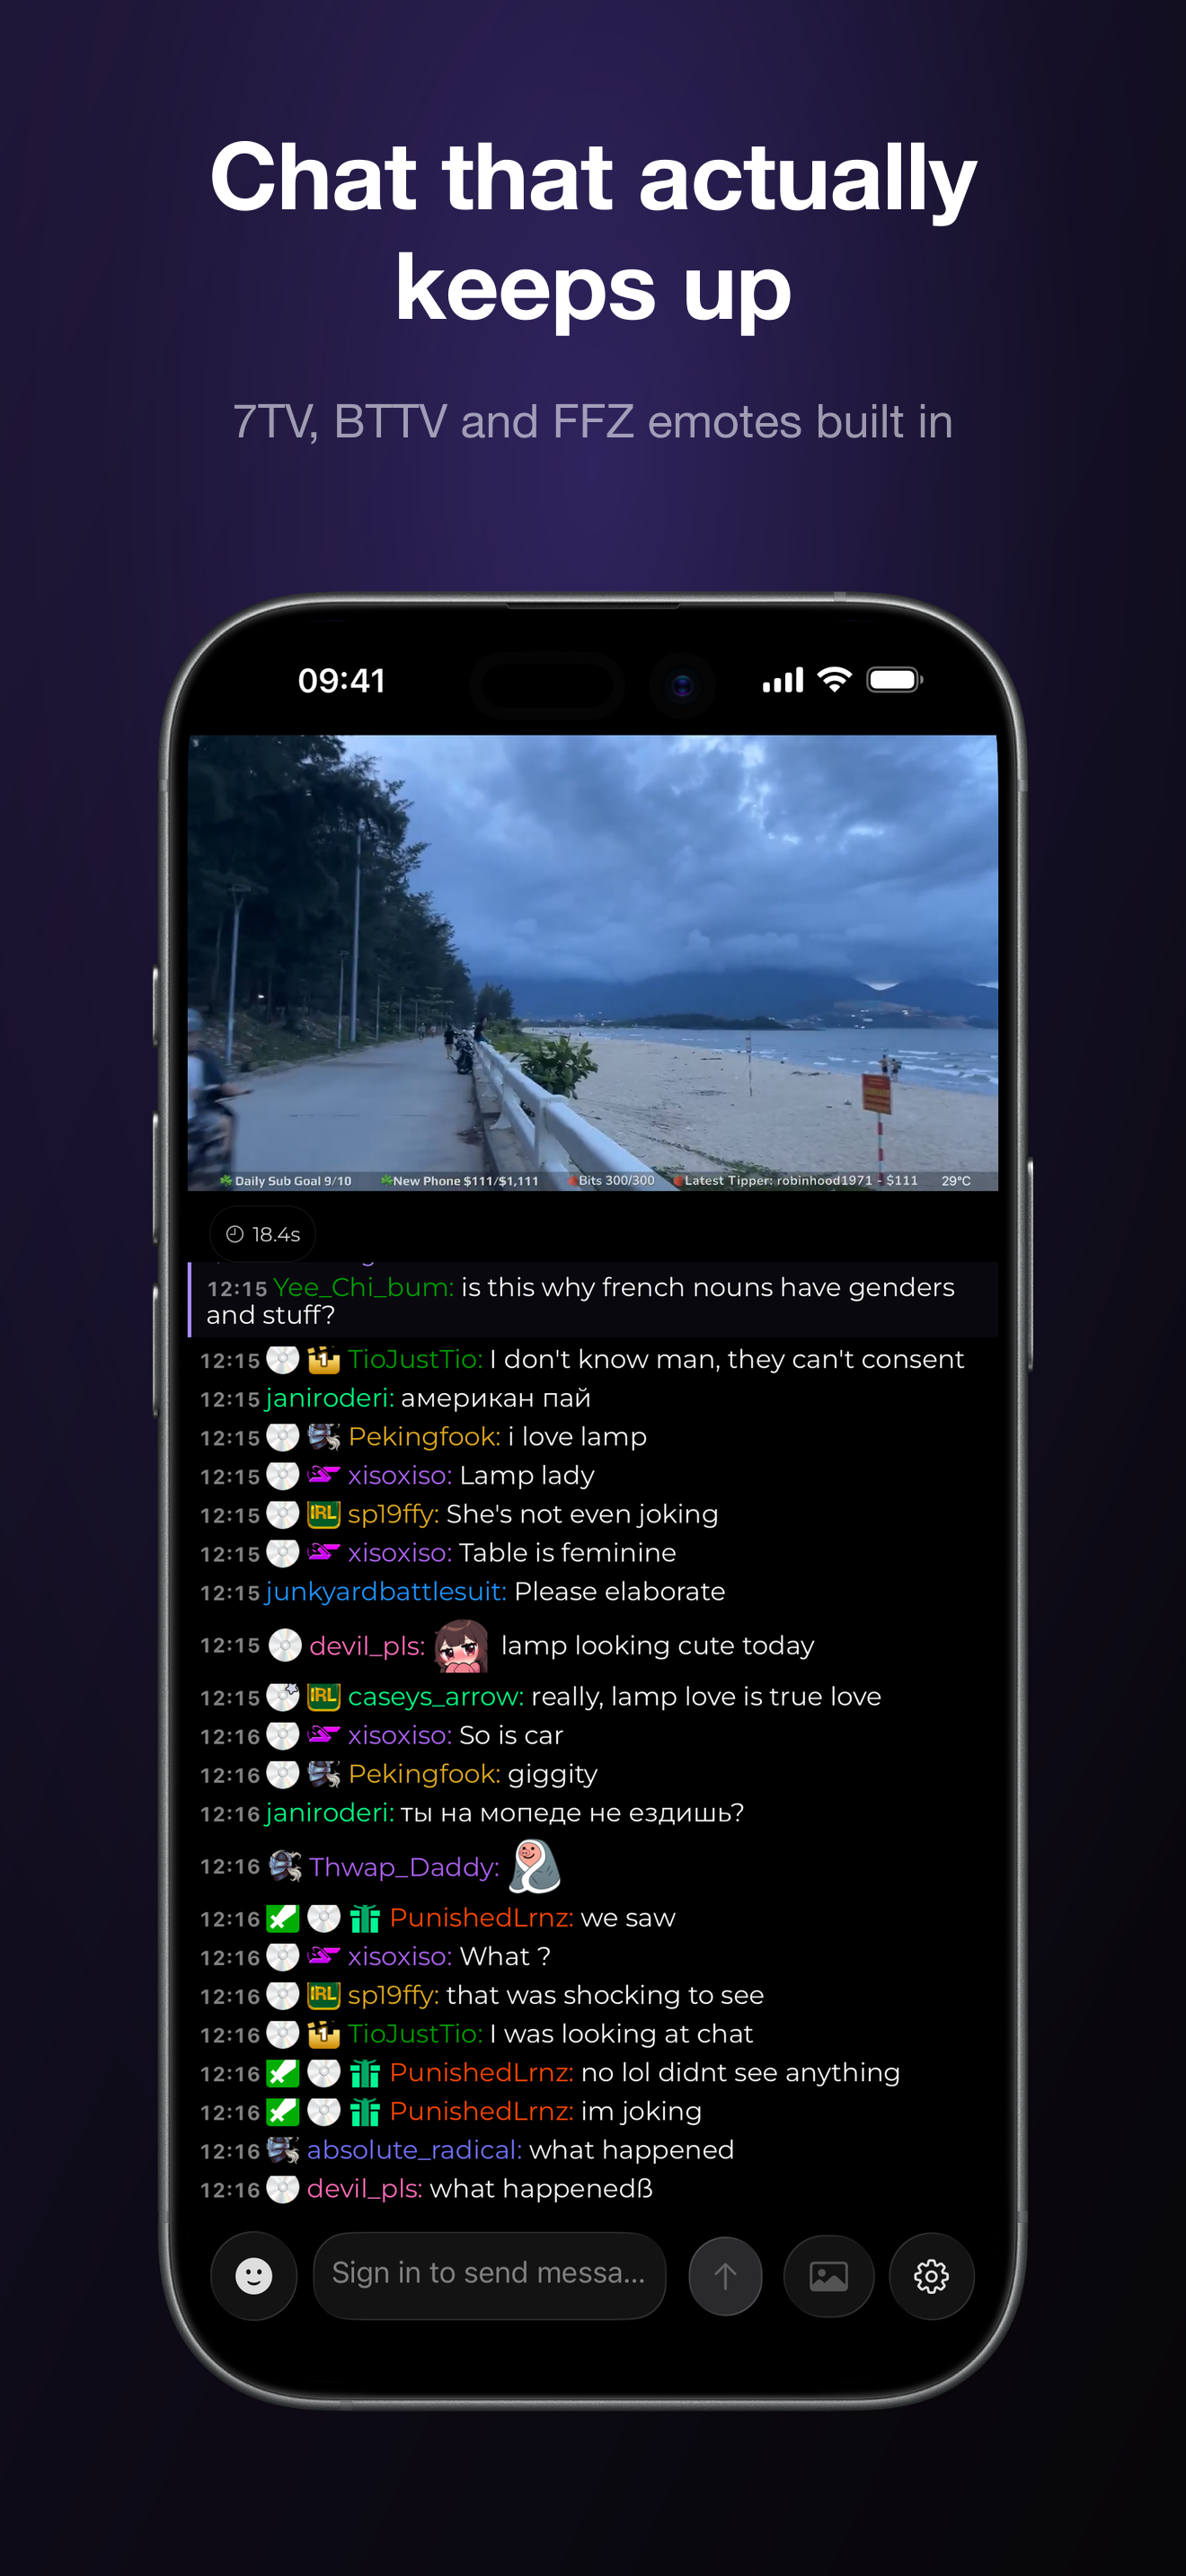
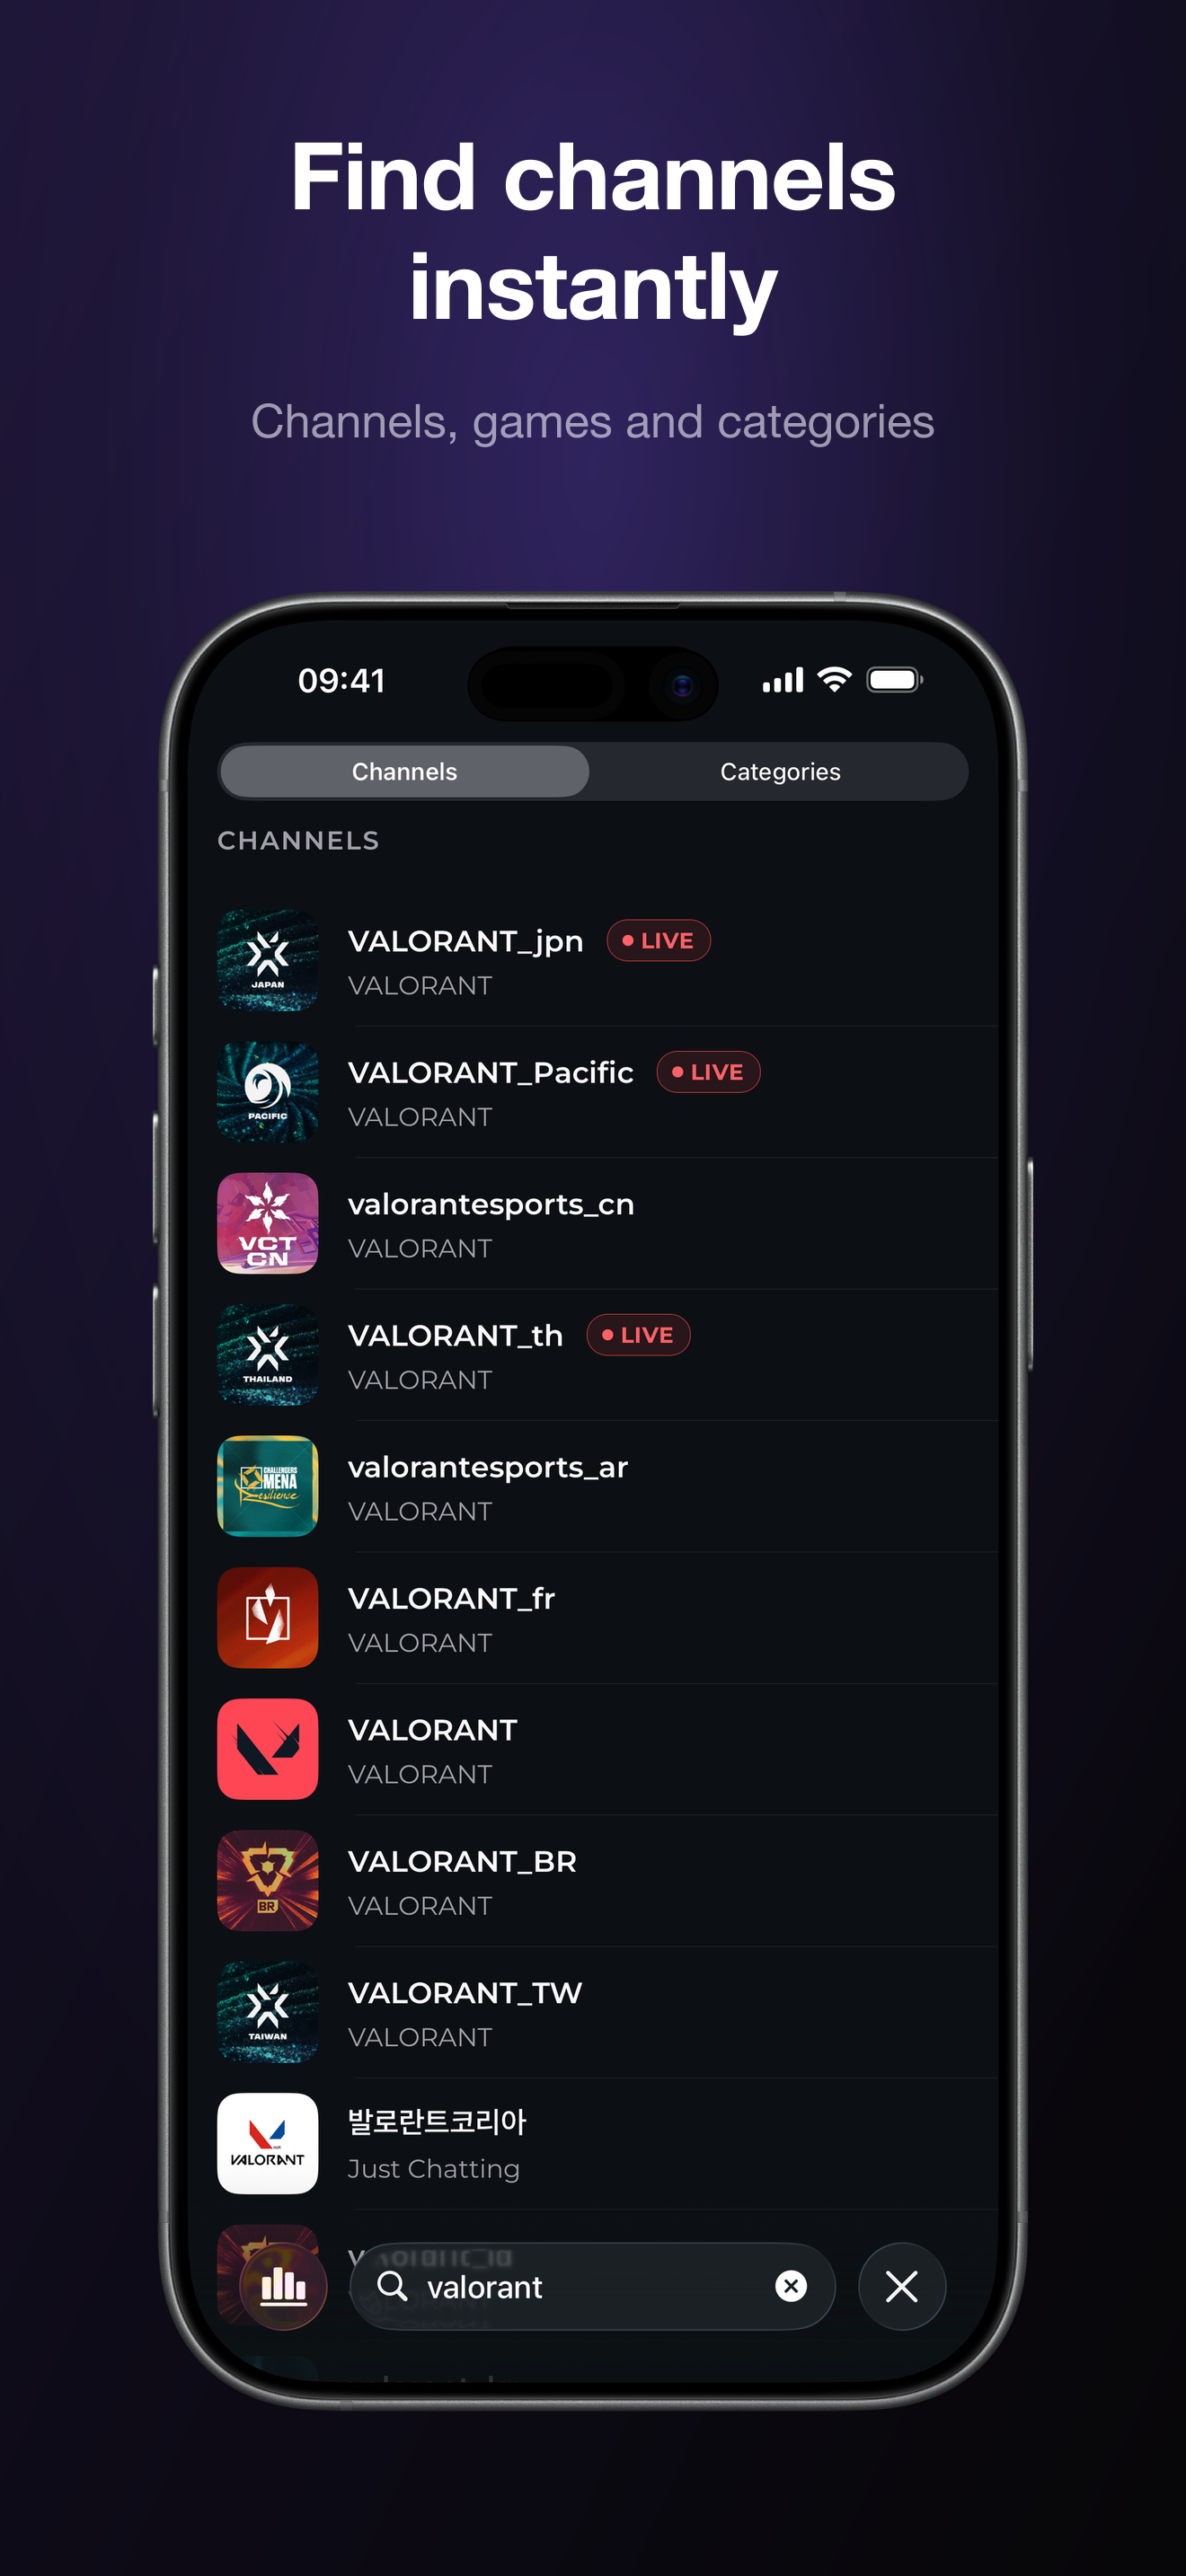
The native Twitch app experience doesn't quite line up with the desktop experience and it lacks support for third-party extensions that many people use to express themselves in chat. This project aims to be a mobile alternative that supports these extensions and provides a cleaner and more intuitive UI.
- Foam mobile app
- Why
- Table of contents
- Project structure
- Store links
- Features
- Architecture and performance
- Getting started
- Contributing
- CI/CD
- Release process
- Testers management
- Debugging
- Managing access to the project and associated services
- API dependencies
- Markdown writing guide
- Bug reports
- License
This is a React Native app. This repository powers the mobile app and several Expo app variants (see app.config.ts):
production— Store release app.testflight— Public TestFlight invite build (foam-testflight).internal— Internal QA distribution build (foam-internal).development— Local development and dev-client installs.e2e— Deterministic UI tests with a mock server.
Each variant uses different iOS bundle identifiers and Android application ids so multiple builds can be installed on one device.
Inspiration on how this project is structured is coming from: Obytess React Native Starter, Aetherspace Green Stack Starter, online docs as Storybook website, Infinite Red cookbook for React Native.
TBA
TBA
Foam is built around the high-churn parts of Twitch: live playback, fast chat, third-party emotes, badges, and cosmetics. The app keeps that path responsive by keeping chat state local, windowed, cached, and measurable.
Chat uses @legendapp/list for virtualized chat rows, bounded message windows, buffered message flushing, memoized row rendering, cached visible-message filtering, and precomputed chat text height where possible.
Performance checks live in a few layers:
bun run test:perfruns the Reassure suite for CI-friendly regression checks.bun run perf:chat:rncaptures React DevTools profiles for chat.bun run perf:chat:rn:diffcompares React DevTools profiles.bun run perf:chat:ioscaptures native iOS Instruments traces.bun run perf:chat:ios:exportexports Instruments traces for inspection.
When changing chat rendering, parsing, scrolling, or scheduling, prefer measuring the real path over simplified mocks. The chat perf tests should model LegendList virtualization behavior closely enough that regressions reflect the behavior in the real world
Chat state uses Legend State so frequent message, emote, badge, and cosmetic updates can avoid broad React re-renders. The chat store is split by responsibility under src/store/chat:
observablescontains module-level observables such aschatStore$.actionscontains write helpers and pure transforms that read or mutate observables.reactcontains selector hooks for components.typescontains shared chat contracts and constants.
Components should import those modules directly instead of importing @legendapp/state primitives themselves. Session-scoped render caches, such as mention colors and lightened colors, live on chatStore$.sessionCaches; persisted channel data, such as emotes, badges, recent messages, and provider fallback data, lives under chatStore$.persisted.
Chat renders many repeated remote images: Twitch badges, third-party emotes, 7TV cosmetics, thumbnails, and preview assets. The shared Image wrapper and chat inline image renderer route those URLs through src/utils/image/image-cache.ts before handing them to expo-image or react-native-nitro-image.
The native cache stores files in Expo's cache directory under chat-img-cache and keeps an MMKV manifest keyed by source URL plus cache variant. Variants such as emote, badge, and image keep different asset classes from colliding. Downloads are deduplicated, priority queued (visible, interactive, background), capped at four concurrent downloads, and evicted by least-recent access when the cache exceeds 100 MB or 5000 records.
Visible chat assets are warmed aggressively. Incoming visible badge and emote URLs are cached with visible priority, emote sheets warm uncached emote variants with interactive priority, and cached file URLs are prefetched once they resolve. On web, the same wrapper uses cacheable object URLs and revokes unused downloads when a component unmounts.
All outbound HTTP goes through createApiClient, which produces one tagged client per upstream in src/services/api/clients.ts: twitchApi, bttvCachedApi, sevenTvApi, ffzApi, and streamElementsApi. The factory centralizes the cross-cutting concerns so the per-service modules under src/services stay thin: case-insensitive header merging (Helix rejects duplicated Client-Id headers), bearer-token injection, a typed ApiError that carries the HTTP status, and Sentry recording for both network failures and non-2xx responses (fingerprinted per service + method + path + status so each broken endpoint is one issue).
Every request is bounded by an AbortController (default 10s, override per client with the timeout option). A timed-out request aborts the connection, records a timeout Sentry event, and throws ApiError with status 408.
This matters because Foam depends on third-party emote and cosmetic services (7TV, BTTV, FFZ, StreamElements) that degrade independently of Twitch. When one stalls without closing the socket the underlying fetch never rejects — and react-query's retry only fires on rejection, so an unbounded request would leave the query pending forever. The timeout converts a silent hang into a retryable error.
Foam uses i18next with react-i18next, initialized in src/i18n/i18next.ts. On launch the active language is detected from the device locale via expo-localization, falling back to en when the device language isn't in supportedLanguages.
English (src/i18n/locales/en.ts) is the source of truth and currently the only shipped locale. Strings are grouped into namespaces (common is the default), including chat, stream, settings, preferences, search, auth, onboarding, errors, and feedback. Key typing comes from src/i18n/i18n.d.ts, which feeds the en resources into i18next's CustomTypeOptions so t() keys are autocompleted and type-checked.
Conventions:
- In components, prefer the
useTranslationhook (array form when a component pulls from more than one namespace). - In hot chat-row render paths, toasts, and plain module-level functions where a hook can't run, call
i18next.t('namespace.key')directly. - For option arrays (settings pickers, segmented controls), store a
labelKeyon each option and resolve it at render time rather than baking translated strings into config.
To add a language: copy en.ts to a new locale typed against the en export so TypeScript flags missing keys, then register it in resources, supportedLanguages, and LANGUAGE_LABELS in src/i18n/i18next.ts.
You will need the following in order to run the project locally:
See Expo React Native project, on how to prepare your environment first. (For more-in-depth understanding of React Native projects navigate to React Native docs and Expo docs).
- Clone this repository
git clone --recurse-submodules https://github.com/luke-h1/foam- If you already cloned without submodules, run
git submodule update --init
- Install
bun
-
  version=$(cat .bun-version)
  curl -fsSL "https://bun.sh/install" | bash -s "bun-v$version"
- Ensure you're on the correct Node version
-
nvm use
nvm install
- Install dependencies
cd foambun install
- Acquire Twitch API credentials
- Create a Twitch account if you do not have one already
- Enable 2FA on your account otherwise you'll not be able to create apps via the developer console
- Go to the Twitch developer console and create a new application. Your OAUTH redirect settings need to look like the following (in order for it to work with the authentication proxy):

-
Copy the client ID and client secret and paste them into a
.envfile in the root of the project. See.env.examplefor an example of what this file should look like -
If you're on Linux or windows, you'll need to setup Android studio and install a device to run the app.
-
If you're on Mac you can just use the iOS simulator (via Xcode) to run the app
- Start the local proxy server
The local proxy lives in
local-proxy/proxy.tsand runs with Bun's HTTP server. It proxies authentication requests to Twitch because Twitch redirect URLs must usehttporhttps. In TestFlight, TestTrack and production, the auth proxy is an AWS Lambda behind API Gateway.
-
bun run start:proxy -
If port
4000is already in use, override it withPORT=4100 bun run start:proxy -
If you need to bind a specific interface, set
HOST, for exampleHOST=127.0.0.1 PORT=4100 bun run start:proxy
- Install development build on your simulator
bun run prebuild
- Run the app
bun run iosbun run android
- Mac - due to being able to run xcode and android simultaneously
IOS:
- Any IOS commands requires Xcode to be installed.
- A simulator must be preconfigured in Xcode settings.
- if no iOS versions are available, install the iOS runtime at
Xcode > Settings > Platforms. - if the simulator download keeps failing you can download it from the developer website.
- Apple Developer
sudo xcode-select -s /Applications/Xcode.appxcodebuild -runFirstLaunchxcrun simctl runtime add "~/Downloads/iOS_17.4_Simulator_Runtime.dmg"(adapt the path to the downloaded file)
- if no iOS versions are available, install the iOS runtime at
- In addition, ensure Xcode Command Line Tools are installed using
xcode-select --install.
- A simulator must be preconfigured in Xcode settings.
- Expo will require you to configure Xcode Signing. We use automatic signing which let's expo deal with the signing so we don't have to do it manually.
- Make sure you do have automatic signing setup properly. Open the project in xcode (
cd ios && xed .) > select the project > Signing & Capabilities > checkAutomatically manage signingand select a team + unique bundle identifier
Android:
- Install "Android Studio"
- Make sure you have the Android SDK installed (Android Studio > Tools > Android SDK).
- In "SDK Platforms": "Android x" (where x is Android's current version).
- In "SDK Tools": "Android SDK Build-Tools" and "Android Emulator" are required.
- Add
export ANDROID_HOME=/Users/<your_username>/Library/Android/sdkto your.zshrcor.bashrc(and restart your terminal).
- Setup an emulator (Android Studio > Tools > Device Manager).
- Make sure you have the Android SDK installed (Android Studio > Tools > Android SDK).
- To run on your phone (ensure connected via a cable) add
-- --deviceto your command (i.e.bun run ios -- --device). - If the Android simulator frequently hangs or is very slow, bump its memory limit
In order to run the development variant of the app locally you will need to run:
bun run prebuild- prebuilds the native part of the app (generatesios&androidfolders)bun run ios- Builds the native part of the app & runs it on iOSbun run android- Builds the native part of the app and runs it on Androidbun run start- once the native part of the project is installed on the emulator/simulator/your physical device you can run the JS metro server- this will start the JS server that bundles and serves a hot-reloaded version of the JS app
- JS server will start automatically when running
bun run iosorbun run android
This project uses RNRepo (@rnrepo/expo-config-plugin + its CocoaPods/Gradle build-tools) to swap some native modules for prebuilt binaries and speed up native builds. On iOS, RNRepo's prebuilt XCFrameworks currently 404 on rnrepo.org for the Expo core modules (expo, expo-modules-core, expo-dev-launcher, expo-dev-menu, expo-log-box) on our RN/SDK combo, so it falls back to building them from source anyway — but leaves behind a build phase and a half-configured Pods project that only "works" while DerivedData is warm.
Because of this, all iOS scripts disable RNRepo by setting DISABLE_RNREPO=true (see package.json: ios, ios:production, prebuild, prebuild:ios, e2e:dev:ios, e2e:prebuild, build:debug:ios, build:local:production:ios). The release path (bun run build:local, via scripts/build.sh) does the same. Android keeps RNRepo enabled — its Gradle prebuilds work fine.
You'll hit this when DerivedData is cleared, the simulator/Pods are wiped, or a native dependency is upgraded without reinstalling pods from source. The iOS build fails with errors like:
ios/Foamdev/AppDelegate.swift:1:17: error: no such module 'Expo'
<unknown>:0: error: module map file '.../Build/Products/Debug-iphonesimulator/Expo/Expo.modulemap' not found
A related variant after upgrading a native pod (e.g. @sentry/react-native) is a stale compiled module: cannot find 'RNSentrySDK' in scope. That one is a stale DerivedData module cache — clearing it forces the rebuild, which then surfaces the RNRepo issue above if pods were installed with RNRepo enabled.
Reinstall pods from source with RNRepo disabled, then build:
# regenerate the Pods project from source (rewrites the gitignored ios/Podfile.lock)
DISABLE_RNREPO=true pod install --project-directory=ios

# then build — the bun scripts already set DISABLE_RNREPO=true for you
bun run ios
If a stale compiled module is also involved, clear that build's DerivedData first:
rm -rf ~/Library/Developer/Xcode/DerivedData/Foamdev-*Note
Just setting DISABLE_RNREPO=true at xcodebuild time is not enough on its own — the flag is only read by RNRepo's pre/post-install hooks, so you must re-run pod install (or any prebuild/run:ios script, which run it for you) to regenerate the Pods project without the prebuilt setup. Re-enable RNRepo on iOS once rnrepo.org publishes matching iOS XCFrameworks.
Comment !surf-deploy on a pull request to publish an EAS Update to a pr-<N> branch on the development channel (see .github/workflows/ota-surf.yml). The workflow posts a QR code as a comment on the PR.
To preview a PR on a device that already has the internal/dev client installed:
- Scan the QR posted on the PR — it opens the dev client directly into that PR's JS bundle.
- Or surf in the launcher: open the dev client → Extensions → EAS Update → pick branch
pr-<N>. Any branch in the project is loadable as long as the runtime version matches the installed build (we usepolicy: 'appVersion').
Re-running surf on the same PR updates the existing QR comment. Fork PRs are skipped (no access to EXPO_TOKEN).
Storybook is currently configured to preview UI components on app. Eventually the plan is to deploy this storybook somewhere on web
Warning
If you add a new .stories.tsx file, you need to run bun run storybook:generate to re-generate the list of all available stories.
To run the production variant of the app locally, you'll need to follow these steps. This is useful for testing the production build configuration, verifying store-ready builds, or debugging production-specific issues.
Warning
The production variant uses different bundle identifiers and package names, so it can be installed alongside the development version on the same device.
- Environment Setup: Ensure you have all the development environment requirements from the Getting started section
- Production Credentials: You'll need production-specific credentials and configuration files:
- Production Google Services files (
GoogleService-Info-prod.plistfor iOS,google-services-prod.jsonfor Android) - Production environment variables in your
.envfile - Valid Apple Developer account and signing certificates for iOS
- Production Google Services files (
-
Set up production environment variables
Ensure your
.envfile contains the correct values -
Start the local proxy server (if needed for local testing and not using the auth proxy lambda)
bun run start:proxy
-
Run the production app
For iOS:
bun run ios:production
For Android:
bun run android:production
These commands will:
- Build the native app with production configuration
- Install it on your simulator/device
- Start the Metro bundler for the JavaScript code
If you want to test the exact production build that would be submitted to the stores, you can use EAS Build:
-
Build locally with EAS
# For iOS
eas build --profile production --platform ios --local

# For Android
eas build --profile production --platform android --local
-
Install the built app
The built
.ipa(iOS) or.apk(Android) files will be in thebuilds/directory and can be installed on your device.
- Bundle identifier conflicts: If you get signing errors, ensure your Apple Developer account has the production bundle identifier (
foam-tv) registered - Missing credentials: Verify all production Google Services files are present and valid
- Environment variables: Double-check that all required production environment variables are set correctly
- Build failures: Check the EAS build logs for detailed error information
- Uses production bundle identifier (
foam-tvfor iOS,com.lhowsam.foamfor Android) - App name shows as "Foam" (without dev suffix)
- No development badge on the app icon
- Uses production API endpoints and credentials
- Optimized for performance and store submission
Use the same prerequisites as production (correct Google services files, env vars, signing), but point at the internal or testflight Firebase / config files from app.config.ts. Then run with the matching APP_VARIANT, for example:
APP_VARIANT=internal expo run:ios
APP_VARIANT=testflight expo run:ios
For store-parity binaries, use eas build --profile internal or eas build --profile testflight (cloud or --local) as in Local EAS build.
This project follows the Conventional Commits specification. Husky is used to execute scripts according to git hooks in order to test if a developer is following the various linting rules and conventional commits. Run bun commit to start an interactive commit. Please familiarize yourself with the specification.
Example:
feat(chat): improve readability of username
chore(deps): update `react-native` to `0.80.0`
fix(streams): fix crash on `LiveStreamScreen`
-
For every change, create a new branch from
main -
Use conventional commits for your commits and other good practices to help ease the review process
-
Open a PR against
main& title it using the pattern mentioned in Conventional Commits.- Provide a proper description of the changes
- Include some screenshots/videos of the change if applicable
- Ensure to test your changes on a physical device as sometimes the simulator works but on a real device it breaks
-
Assign a reviewer to the PR
-
After the PR is approved & the checks pass, merge it to
main -
Merging to
mainrunsdeploy-ota-or-native.yml, which publishes a production EAS Update when native fingerprints are unchanged, or builds and submits store binaries when native code changes (see Deploy flows). For internal, testflight, or production cloud builds without going through that pipeline, use the manual workfloweas-deploy.ymlin GitHub Actions.
We use tsconfig-paths to alias imports.
Sometimes you may want to run the app on your device to check your changes, see how it looks on a real device etc. In order to do this you need to run some steps to configure your device for the first time.
-
Connect your phone via cable to your laptop/machine (you must ensure both devices are on the same network, otherwise this will not work.). Make sure to trust the phone/laptop when prompted.
-
Open the project in Xcode:
cd ios && xed .Make sure to login to xcode if you haven't already -
Your phone will then pair + connect to xcode. Let that complete
-
When prompted select the project and click the 'hide code' button in the top-right
-
Navigate to signing & capabilities
-
Select your team, ensure the bundle identifier matches the dev variant (for example
foam-tv-devfromapp.config.ts, or another unique id) and select your device from the dropdownFoam > YourPhoneName -
Run a build by clicking the play button
-
The app will then install on your device and run. Hot reloading will also work
If you get an error such as no development servers found then this means the laptop and/or phone is on a different network.
Pull requests run checks in .github/workflows/:
| Workflow | Trigger | Purpose |
|---|---|---|
lint-format.yml |
Pull requests | One job for Prettier, ts:check, ast-grep, ESLint, and commitlint over the PR range. |
jest.yml |
Pull requests | Runs the Jest suite with --maxWorkers=100%. |
native-lint.yml |
Pull requests touching modules/** or the native lint config |
SwiftLint/SwiftFormat on macOS and ktlint on Linux. |
chat-performance.yml |
Pull requests touching chat sources or the dependency graph | Measures the reassure chat perf suite against the PR base on the same runner and comments the diff. |
react-doctor.yml |
Pull requests | Runs React Doctor against the PR baseline. |
detect-fp-changes.yml |
Pull requests whose diff is not entirely JS/docs | Compares Expo native fingerprints for production, testflight, and internal against the PR base and comments on PRs. |
enforce-rebase.yml |
Pull requests | Rejects merge commits so branch history stays linear. |
label.yml |
Pull requests | Applies labels via labeler. |
anti-slop.yml |
Pull requests | Runs peakoss/anti-slop, exempting draft PRs. |
self-hosted-runner.yml |
Pull requests with the self-hosted-test label, or manual dispatch in luke-h1/foam |
Runs bun run lint on the self-hosted foam runner. |
zizmor.yml |
Pull requests targeting main that touch .github/** |
Audits GitHub Actions workflows for security issues with zizmor. |
warm-cache.yml |
Pushes to main that change the dependency graph |
Writes the shared bun install cache that PR jobs restore from. |
Scheduled CodeQL runs weekly on the default branch.
flowchart LR
  PR[Pull request] --> Checks[lint-format.yml]
  PR --> Jest[jest.yml]
  PR --> Doctor[react-doctor.yml]
  PR --> Rebase[enforce-rebase.yml]
  PR --> Label[label.yml]
  PR --> Slop[anti-slop.yml]
  PR -->|modules/**| Native[native-lint.yml]
  PR -->|chat sources| Perf[chat-performance.yml]
  PR -->|non-JS diff| FP[detect-fp-changes.yml]
  PR -->|.github/**| Zizmor[zizmor.yml]
  PR -->|label self-hosted-test| SH[self-hosted-runner.yml]
  Main[main] -->|bun.lock| Warm[warm-cache.yml]
  Schedule[Weekly schedule] --> CodeQL[codeql.yml]
Static analysis and GitHub Actions security are checked in two places:
| Workflow | Trigger | Purpose |
|---|---|---|
zizmor.yml |
Pull requests targeting main that touch .github/** |
Scans workflow YAML for unsafe permissions, injection risks, unpinned actions, and related CI issues. |
codeql.yml |
Weekly schedule on the default branch | Runs GitHub's static analysis and uploads results to code scanning. |
Keep workflow permissions scoped to the smallest set each job needs, keep persist-credentials: false on checkout unless a job must push, and pin third-party actions to full 40-character commit SHAs instead of floating tags like @v4.
To get the hash for an action release tag, resolve the tag to the commit SHA and use that value in uses::
git ls-remote https://github.com/actions/checkout "refs/tags/v4^{}" "refs/tags/v4"
git ls-remote https://github.com/zizmorcore/zizmor-action "refs/tags/v0.1.1^{}" "refs/tags/v0.1.1"
Prefer the refs/tags/<tag>^{} line when it exists; that is the commit behind an annotated tag. If only refs/tags/<tag> is returned, use that SHA. For an action without a release tag, inspect the upstream repository and pin a specific commit:
git ls-remote https://github.com/OWNER/REPO HEADAfter changing workflow action pins, run zizmor locally when available, or rely on zizmor.yml to check the pull request before merge.
We use EAS to build, submit, ship EAS Update payloads, and observe production startup performance with EAS Observe.
There are four installable variants today (each has distinct iOS bundle id and Android application id so they can sit side by side on one device):
production— Store release app; store profiles live ineas.json(productionbuild profile,productionupdate channel).testflight— Public TestFlight invite build (testflightprofile and channel).internal— Internal QA distribution builds (internalprofile and channel). iOS devices must be registered for ad hoc builds.development— Local dev and dev-client installs only (developmentprofile); not distributed from CI.
Additional build profiles (for example e2e) are used for Maestro E2E runs and CI; see eas.json.
Production delivery is automated on the default branch. Internal, TestFlight, and forced production deploys can also be kicked off manually from GitHub Actions.
| Workflow | Trigger | What it does |
|---|---|---|
deploy-ota-or-native.yml |
Push to main, or Run workflow with variant, deploy_type, platform, dry_run, and critical_update inputs. Pushes default to production, auto, and ios. |
Runs bun run test:ci and bun run ts:check, compares cached native fingerprints for the selected variant, then either publishes an OTA with eas update --channel <variant> using the local environment or runs local eas build + eas submit. OTA deploys update CHANGELOG.md; native deploys update CHANGELOG.md and create a GitHub Release. Sends Slack notifications when release metadata is produced. |
eas-deploy.yml |
Run workflow with variant (production, testflight, internal) and platform (all, ios, android). |
Runs eas build --profile <variant> --platform <platform> --no-wait --auto-submit as a cloud EAS build. Requires EXPO_TOKEN. |
rollout-ota.yml |
Run workflow with an OTA update group id and target rollout percentage. | Fetches the current rollout state and progresses an existing rollout with eas update:edit --rollout-percentage. |
rollback-ota.yml |
Run workflow with channel, rollback_target, and platform. |
Rolls the selected channel back to embedded by runtime version, or republishes a previous OTA update group to the selected channel. |
e2e.yml |
Run workflow with optional force_rebuild. |
Fingerprints the iOS e2e profile on the self-hosted foam runner, restores or builds a cached local EAS .app, optionally pushes an e2e OTA when the build is skipped, then runs the Maestro flows on the self-hosted foam runner. |
clear-cache.yml |
Run workflow. | Deletes GitHub Actions caches while preserving OTA fingerprint and production OTA id caches. |
There is also a draft EAS Workflows file at .eas/deploy-prod.yml (mostly commented / experimental); GitHub Actions above are the source of truth for how this repo deploys today.
flowchart TD
  A[Push to main] --> P[prepare version from app.config.ts]
  A --> T[bun run test:ci and ts:check]
  P --> D[detect-changes fingerprints]
  T --> D
  D -->|fingerprint changed or force build| B[local EAS build + submit selected variant]
  D -->|fingerprint unchanged or force OTA| U[eas update selected channel]
  B --> R[tag and changelog]
  U --> R
  R --> S[Slack notify]
The native-vs-OTA decision stores fingerprints in a private S3 bucket so the
same cache is available to GitHub Actions and local deploy scripts (also to avoid recent reliability issues with GHA). Configure
these fields in the op://ci-cd/foam-staging 1Password item, and export the
same values locally before running bun run deploy -- ... or
bun run ota -- ...:
FOAM_AWS_FINGERPRINT_ACCESS_KEY_IDFOAM_AWS_FINGERPRINT_SECRET_KEYFOAM_AWS_FINGERPRINT_BUCKET_NAME
FOAM_AWS_REGION defaults to eu-west-2 when it is not set.
The IAM user only needs read/write access to these object prefixes:
s3://<FOAM_AWS_FINGERPRINT_BUCKET_NAME>/fingerprints/*s3://<FOAM_AWS_FINGERPRINT_BUCKET_NAME>/ota-critical-index/*s3://<FOAM_AWS_FINGERPRINT_BUCKET_NAME>/ota-update-ids/*
Use infrastructure/iam-fp-policy.json
for an example IAM policy
flowchart LR
  H[GitHub Actions eas-deploy.yml] --> C[Choose variant production, testflight, or internal]
  C --> PL[Choose platform all ios android]
  PL --> E[bun run build variant platform]
  E --> EAS[EAS cloud build and auto-submit]
flowchart TD
  subgraph rolloutWf["rollout-ota.yml"]
    R1[Inputs update group id and target percent] --> R2[eas update:edit rollout percentage]
  end
  subgraph rollbackWf["rollback-ota.yml"]
    B1{rollback target}
    B1 -->|embedded| B2[eas update:roll-back-to-embedded per platform]
    B1 -->|group id| B3[eas update:republish to channel]
  end
We use Maestro for E2E testing. Flows live in e2e/flows/ and run against a local mock server (e2e/mock-server/) for deterministic results — Twitch API, IRC chat, and emote/badge providers are all mocked.
# Install Maestro (one-time)
brew install mobile-dev-inc/tap/maestro

# Build + install the simulator app (one-time, or when native code changes)
bun run e2e:prebuild               # generate native projects for the e2e variant
bun run e2e:build:ios:sim          # xcodebuild → ios/build/...Foamdev.app
xcrun simctl install booted ios/build/Build/Products/Debug-iphonesimulator/Foamdev.app

# Run flows (three terminals)
bun run e2e:mock-server:dev                    # Terminal 1: Mock server
EXPO_PUBLIC_APP_VARIANT=e2e bunx expo start    # Terminal 2: Metro (e2e variant)
bun run e2e:test                               # Terminal 3: Flows
The local app is an expo-dev-client build: the launch subflow (e2e/flows/common/launch.yaml) deep-links it into Metro, so Metro must run with EXPO_PUBLIC_APP_VARIANT=e2e (that's what points the app at the mock server and skips onboarding). If Metro runs on a non-default port, pass E2E_METRO_PORT.
| Flow | Covers |
|---|---|
smoke.yaml (tag: smoke) |
App launches and the Top / Search / Settings tabs are present |
navigation.yaml |
Open a stream from Top, switch to the Categories segment |
category.yaml |
Category screen lists streams with a viewer count |
chat.yaml |
Stream screen renders the player and the chat input bar |
following.yaml |
Following tab hidden when signed out; sign-in entry point reachable |
search-and-settings.yaml |
Channel/category search with filters; Settings → Dev Tools → Debug |
- Start every flow with
runFlow: common/launch.yaml— it launches the app, suppresses the expo-dev-menu overlays, and (for dev-client builds) deep-links into Metro. - Pass shared env through
scripts/e2e-maestro.shrather than hardcoding: flows receiveAPP_ID,DEV_CLIENT, andDEV_CLIENT_URL. - Maestro launch
argumentsdo not reach iOSNSUserDefaults— the wrapper script writes dev-menu preferences withdefaults writeinto the simulator app container instead. - Tag fast critical-path flows with
tags: [smoke]so they run ine2e:test:smoke.
Creates a self-contained app with bundled JS - no Metro needed:
# Build standalone E2E app
bun run e2e:build:ios

# Run flows after installing the built `.app` on a booted simulator
bun run e2e:mock-server:dev               # Terminal 1
APP_ID=foam-tv-e2e DEV_CLIENT=false bun run e2e:test # Terminal 2| Command | Description |
|---|---|
bun run e2e:build:ios:sim |
Build iOS simulator app (dev client) |
bun run e2e:test |
Run all Maestro flows |
bun run e2e:test:smoke |
Run smoke flows only (--include-tags) |
bun run e2e:build:ios |
Build standalone app (CI) |
bun run e2e:build:android |
Build standalone app (Android) |
bun run e2e:mock-server:dev |
Start mock server (auto-reload) |
Environment variables for e2e:test (see scripts/e2e-maestro.sh): APP_ID (default foam-tv-dev), DEV_CLIENT (default true), E2E_METRO_PORT (default 8081).
Flows fail on a dev-menu sheet / launcher screen
The expo-dev-menu onboarding sheet or the dev-launcher server picker can cover the app on a fresh install. scripts/e2e-maestro.sh writes the dev-menu preferences into the simulator app container before running, and the launch subflow deep-links past the server picker — but both need the app installed and the simulator booted first. Failure screenshots land in ~/.maestro/tests/<run>/.
Matchers: prefer testIDs
Mock fixtures repeat across pagination pages, so text matchers can be ambiguous. Stable testIDs exist for the chat input (chat-input-bar), connecting placeholder (chat-sync-placeholder), player area (stream-player-container), top lists (top-streams-list, top-categories-list), and category header subtitle (category-viewer-count).
The standalone E2E app supports OTA updates via the e2e channel, eliminating the need to rebuild for JS-only changes:
# Push JS update to E2E builds (no native rebuild needed)
eas update --channel e2e --message "Fix E2E test"
Only rebuild (bun run e2e:build:ios) when native code changes. Use fingerprinting to detect this automatically in CI.
Use this when you want binaries on your machine (parity with CI) or to avoid queue wait during iteration. Requires EAS CLI and eas login.
# Cloud build (wait for Expo builders)
eas build --profile production --platform ios
eas build --profile internal --platform android
eas build --profile testflight --platform ios

# Compile on this machine (artifacts under ./build-artifacts or default EAS output)
eas build --profile production --platform ios --local
eas build --profile production --platform android --local
Profiles and channels are defined in eas.json. See EAS Build for credentials, credentials.json, and --local requirements (Xcode / Android SDK).
The public app is distributed via the stores and is not in wide release yet. Shipping happens through EAS Build, EAS Submit, and EAS Update as described in Deploy flows.
- Merge to
main—deploy-ota-or-native.ymlruns automatically. Use Run workflow on that file to force OTA or build, pick platform, or set dry run (skips release creation). - Manual cloud build + submit — GitHub → Actions → EAS app deployment (
eas-deploy.yml). - From your machine (uses EAS cloud builders, non-blocking with
--no-waitas in npm scripts):
bun run build:production:android— Android production build and auto-submit to Google Playbun run build:production:ios— iOS production build and auto-submit to App Store Connectbun run build:internal:ios/build:internal:android/build:internal— internal QA distribution buildsbun run build:testflight:ios/build:testflight— public TestFlight invite builds
You can inspect build history on the EAS Builds dashboard, submissions on EAS Submissions, production performance in EAS Observe, and the queue on EAS build status.
- Marketing / release tag version —
VERSIONinapp.config.tsis read bydeploy-ota-or-nativefor native release tags and changelog flow. - Store build numbers —
eas.jsonsets"appVersionSource": "remote"so compatible native version fields are managed on Expo’s side for production builds (see EAS app version).
The fastlane/ directory is a git submodule pointing at luke-h1/foam-fastlane. It holds the App Store screenshots, app preview video, and Deliverfile. These assets live in a separate repo so their binary history (~60 MB per screenshot set) doesn't bloat this repo's clones and pushes.
Important
Run git submodule update --init after cloning (or clone with --recurse-submodules) before running any fastlane commands. CI jobs that need these assets must check out submodules too (e.g. actions/checkout with submodules: true).
To update store assets:
- Commit and push the changes inside
fastlane/(it's its own repo onmain). - Back in this repo, commit the bumped submodule pointer:
git add fastlane && git commit.
At the moment we do the internal testing for the production app variant.
Every time a new version is published to the stores testers all testers are able to test it out.
Android Internal testing track
In order to join the internal testing of the Android app distributed via Google Play Store you need to:
- Be able to access Google Play Console using your email.
- Go to the Google Play Console Internal Testing panel.
- open details of
Foam internal testersgroup - provide email address of the tester that is associated with a Google account used in Play Store
- hit
Save changesbutton
- open details of
- Instruct the invited tester to open Internal testing joining link.
- Anytime a new app version is published to the internal testing track the tester will have to ensure the app is updated by visiting Play Store and re-installing the app
- The app is available at Play Store, but the link is available only to the testers that are added to the internal testing track.
iOS TestFlight internal testing track
In order to join the TestFlight internal testing of the iOS app distributed via App Store you need to:
- Be able to access App Store Connect
- Invite the person to the team via
Users and Access.- provide
First Name,Last Name,Email - select
Customer Supportrole - hit
Nextbutton - ensure only the
Foamapp is selected - hit
Invite
- provide
- Before we move on the person has to accept a team invitation that is sent via an email.
- Go to the App Store Connect TestFlight panel.
- hit
+button and select the person from the list - hit
Addbutton
- hit
- Instruct the tester to open an email that is sent when the tester is added to the TestFlight group and follow the instructions to redeem the TestFlight invitation code.
- Anytime a new app version is published to the TestFlight the tester will have to ensure the app is updated by visiting TestFlight.
- React Native comes with
React Native DevToolsintegrated by default. Using them you can:- inspect the React component tree
- debug the application using breakpoints
- access the runtime state of the application
- Highlight re-renders & more
- Use Xcode instruments for debugging IOS performance issues - https://reactnative.dev/docs/next/debugging-native-code
- Use Android studio performance profiler to debug Android performance issues
open project > view > tool windows > profiler
-
- access Play Console app dashboard
- manage releases to the Beta Testers
- manage data visible on the Play Store associated with the app
-
- access App Store Connect app dashboard
- manage releases to the TestFlight
- manage data visible on the App Store associated with the app
-
- access EAS dashboard
- manage builds and submissions
- manage app versioning
- manage Android and iOS specific credentials needed for building and submitting the app to the stores
- currently this account needs to be transferred to an org to enable sharing.
- The app currently depends on the following APIs and services to deliver its content
| Title | Description | Base URL |
|---|---|---|
| Auth proxy | Auth Lambda - handles proxying twitch authentication requests | redacted for security |
| Twitch ID | Twitch Authentication API | https://id.twitch.tv |
| Twitch Helix | Twitch rest API | https://api.twitch.tv/helix |
| Twitch eventsub | Event sub WebSocket - used for reacting to twitch events in chat | wss://eventsub.wss.twitch.tv/ws |
| Twitch badges | Provides Twitch badges | https://badges.twitch.tv/v1/badges |
| V3 7TV | Used for 7tv emotes and emotes in chat | https://7tv.io/v3 |
| 7TV events | 7TV event WS - used for reacting to 7TV emote/badge/paint changes in chat | wss://events.7tv.io/v3 |
| V4 7TV | V4 GQL endpoint - will be used for user paints | https://7tv.io/v3 |
| BTTV | Used for BTTV badges and emotes in chat | https://api.betterttv.net |
| BTTV WS | Used to subscribe and react to BTTV badge/emote changes | wss://sockets.betterttv.net/ws |
| BTTV V3 cached | Returns cached BTTV emotes and badges | https://api.betterttv.net/3/cached |
| BTTV V3 cached FFZ | Returns cached FFZ emotes and badges | https://api.betterttv.net/3/cached/frankerfacez |
| V1 FFZ | V1 FFZ - used for FFZ emotes & badges | https://api.frankerfacez.com/v1 |
Note
To check the status of these services, visit their respective status pages:
- Twitch services: https://status.twitch.com/
- 7TV services: https://status.7tv.app/
- Auth proxy: https://status.lhowsam.com
- BTTV and FFZ do not have status pages
-
When editing this README, keep the table of contents in sync with new top-level sections.
-
Take advantage of using GitHub flavored markdown
[!NOTE] This is a note
[!WARNING] This is a warning
[!IMPORTANT] This is important
[!TIP] This is a tip
[!CAUTION] This is a caution
If you encounter a problem with this project, please open an issue. Be sure to include:
- Node version
- OS
- Brief but thorough reproduction steps of the issue (including screenshots/videos)
This project is licensed under the BSD 3-Clause License.