This software is a port of SmsPlus, a Sega Master System and Game Gear emulator for RP2040/RP2350 based microcontroller boards like the RaspberryPi Pico and Pico 2. Sound and video are ouput over HDMI. The code for HDMI output is based on Shuichi Takano's Pico-InfoNes project which in turn is based on PicoDVI.
Create a FAT32 (recommended. see #29) or exFAT formatted SD card and copy your Master System (.sms) and/or Game Gear (.gg) roms and optional metadata on to it. You can organize the roms in directories. A menu is displayed on which you can select the rom to play. The last 20 games you started are kept in a recently played list, one button press away in the menu.
Supports two controllers for two player Master System games. See "about two player games" below for specifics and limitations
Save and load state possible.
Battery backed saves stored on SD for games that support this.
See the releases page for the supported RP2040/RP2350 boards.
Click on image below to see a demo video.
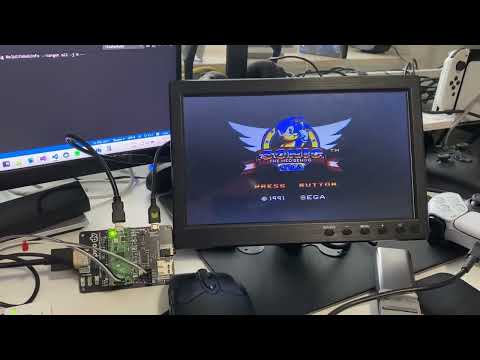
The emulator works very well on the Pico 2/RP2350. On the Pico/RP2040, some games may not run at full speed or at all. (like afterburner).
Warning
On Pico/RP2040, some games show red flashing between screens. This can be occasionally or severe depending on the game. If you are sensitive for this, or experience health issues while playing those games, please stop playing immediately.
For Sega Master System (SMS) games that support it, progress can be saved to SD card.
- Saving: To ensure game data is written to the SD card, you must return to the main menu by pressing Select + Start.
- Save Location: Save files are stored in the
/SAVESdirectory with a.SAVextension. - Auto-Loading: When you start a game, its corresponding
.SAVfile will be loaded automatically (if available).
Note
Make sure to return to the menu before powering off, or the save data may be lost.
A number of Japanese Master System games can use the YM2413 (OPLL) FM sound chip, an add-on that was sold with the Japanese Mark III and built into the Japanese Master System. On those games the FM chip replaces the standard PSG soundtrack with a much richer one. Games that support it include:
- Phantasy Star (Japanese release)
- Wonder Boy III: The Dragon's Trap
- Ys
- After Burner
and a number of others. Games that do not support FM are unaffected by the setting — they never address the chip and sound exactly the same either way.
FM emulation is off by default. Turn it on with the YM2413 FM entry in the settings menu.
Important
Enabling YM2413 FM raises the processor clock from 252 MHz to 378 MHz to cover the extra work of emulating the chip. The board reboots to apply the new clock, and reboots again when the setting is turned back off. For that reason it is worth leaving off unless you are actually playing a game that uses FM.
The setting is only present on HSTX-based RP2350 configurations, which is where the emulator has the headroom for it:
| Board / configuration | Binary |
|---|---|
| Breadboard or PicoNES PCB with a Pico 2 / Pico 2 W / Pimoroni Pico Plus 2 | picosmsPlus_AdafruitDVISD_pico2_arm.uf2, picosmsPlus_AdafruitDVISD_pico2_w_arm.uf2 |
| Adafruit Metro RP2350 | picosmsPlus_AdafruitMetroRP2350_arm.uf2 |
| Adafruit Fruit Jam | picosmsPlus_AdafruitFruitJam_arm_piousb.uf2 |
| Murmulator M2 | picosmsPlus_MurmulatorM2_arm.uf2 |
On every other configuration — all RP2040 boards, and the RP2350 boards that use the PicoDVI video driver instead of HSTX — the entry does not appear in the settings menu and those games fall back to their PSG soundtrack.
The binary specific for your config can be downloaded from the releases page.
You need a FAT32 or exFAT formatted SD card to put your .sms and .gg roms on, preferably in /roms/SMS (subdirectory organization is supported). It is highly recommended to use FAT32, see #29
Note
For detailed instructions how to setup specific configurations, see the Pico-InfonesPlus sister project.
- Raspberry Pi Pico and Pimoroni Pico DV Demo Base
- PicoNES custom printed circuit board
- Breadboard with components.
These boards already contain an RP2040 cpu, a separate Raspberry Pi Pico is not needed.
- Adafruit Feather RP2040 with DVI Output and FeatherWing - RTC + SD.
- Waveshare RP2040-PiZero Development Board
- Adafruit Fruit Jam
- Adafruit Metro RP2350 or Adafruit Metro RP2350 with PSRAM
- Pimoroni Pico Plus 2 Use the breadboard config, the Pimoroni Pico DV Demo base, or the PicoNES PCB from design v2.6 onwards — that revision added through-holes, so the board can be plugged in on male headers instead of lying flat against the PCB, which the SP/CE connector on its back prevents. The PSRAM on the board is used in stead of flash to load the roms from SD.
- Waveshare RP2350-PiZero
- Waveshare RP2350-Zero and Waveshare RP2350-USB-A, each on their own PCB — see Custom PCBs.
Three community PCB designs turn a supported board and its breakouts into a finished little console, each with an optional 3D-printed case. They are simply a neater way to build hardware this emulator already supports, so nothing changes in the firmware: flash the binary for that configuration and you are done.
| Design | Board it carries | Build | Gerber archive | Designed by |
|---|---|---|---|---|
| PicoNES | Pico 2, Pico 2 W, Pimoroni Pico Plus 2 or an original Pico | -c2 |
pico_nesPCB_v2.6.zip |
John Edgar Park |
| PicoNES Mini | Waveshare RP2350-Zero | -c6 |
Gerber_PicoNES_Mini_PCB_v2.0.zip |
Gavin Knight |
| PicoNES Micro | Waveshare RP2350-USB-A | -c9 |
Gerber_PicoNES_Micro_v1.2.zip |
Gavin Knight |
All three archives are attached to every release of this project and also live in pico_shared/PCB. Upload the zip as-is to a PCB manufacturer of your choice; PCBWay and JLCPCB are both good options.
The designs come from pico-infonesPlus and kept their NES-flavoured names, but there is nothing NES-specific about them — they are DVI, microSD and controller wiring, and this emulator runs on them just as well. The PicoNES and PicoNES Mini both have two controller ports, so two player Master System games work on them; the PicoNES Micro is a single-controller design.
Note
Sellers on AliExpress have copied the PicoNES design and sell ready-made boards. For questions about those, contact the seller.
The original design, by @johnedgarpark. It carries the Pico, the DVI and microSD breakouts and up to two NES controller ports. It is also the only one of the three that takes an interchangeable Pico-format board, which is what makes a Pimoroni Pico Plus 2 — and with it PSRAM — an option, and the only one that can carry an original RP2040 Pico. The current design is v2.6.

Design v2.6 added through-holes, so there are now two ways to fit the board:
| Mounting | Boards | Design version |
|---|---|---|
| Soldered flat onto the PCB, no headers | Pico 2, Pico 2 W, Pico | any |
| Male headers plugged into the through-holes | Pico 2, Pico 2 W, Pico, Pimoroni Pico Plus 2 | v2.6 or later |
Important
A Pimoroni Pico Plus 2 needs v2.6 and male headers. On v2.1 and older designs the board has to lie flat against the PCB, which the SP/CE connector on the back of the Pimoroni Pico Plus 2 prevents.
Note
Soldering skills are required. Solder every connection from the Pico to the PCB, including the ones on the short right-hand side of the board — those are ground.
- One of the following, mounted as described above:
- Raspberry Pi Pico 2 or Pico 2 W without headers, soldered flat.
- Raspberry Pi Pico 2, Pico 2 W or Pimoroni Pico Plus 2 with male headers soldered on (these fit), plugged into the through-holes.
- An original Raspberry Pi Pico, either way — see RP2040 notes for what the RP2040 gives up.
- Adafruit DVI Breakout Board — For HDMI Source Devices
- Adafruit Micro SD SPI or SDIO Card Breakout Board — 3V ONLY!
- For controllers on the GPIO ports:
- one or two NES controller ports — populate both if you want to play two player Master System games
- NES or SNES controllers
- Micro USB to OTG Y-cable if you want to use a USB game controller — it powers the board and connects the controller at the same time.
- Micro USB power supply.
- Optional: an on/off switch, such as this one.
Note
A plain NES controller has no Button3, so it cannot open the recently played list directly — use the settings menu entry instead. The sockets speak the SNES protocol as well, so an SNES pad with a SNES-to-NES adapter cable — or one you make yourself — is the better choice.
- Pico 2 and Pimoroni Pico Plus 2 —
picosmsPlus_AdafruitDVISD_pico2_arm.uf2 - Pico 2 W —
picosmsPlus_AdafruitDVISD_pico2_w_arm.uf2 - Original Pico —
picosmsPlus_AdafruitDVISD_pico_arm.uf2 - Pico W —
picosmsPlus_AdafruitDVISD_pico_w_arm.uf2
The Pimoroni Pico Plus 2 needs no separate build. The emulator reads the real flash size from the chip at boot and detects PSRAM at runtime, so the same pico2 image adapts to whichever board is plugged in.
The Pimoroni Pico Plus 2 brings 8 MB of PSRAM and 16 MB of flash. The PSRAM is what you notice: roms are loaded into it and a game starts the moment you select it, instead of after the wait a plain Pico 2 needs to write the rom to its flash.
Gavin Knight (DynaMight1124) designed an NES-like enclosure for this PCB: thingiverse.com/thing:6689537. The v2.0 design has a base, a power-switch part and a choice of two top covers — one with a button that reaches the BOOTSEL button so firmware can be updated without opening the case, one without. Print the files that match the PCB version you own; Gavin's Thingiverse page has the details.
Important
If the Pico is mounted with male headers, download the latest top cover. Headers raise the Pico, and only the newest cover leaves room for the USB cable — the older ones assume a Pico soldered flat onto the PCB.

For the full photo gallery and assembly detail, see the PCB section of the pico-infonesPlus documentation.
A smaller take on the same idea by Gavin Knight (DynaMight1124), built around a Waveshare RP2350-Zero and two NES controller ports. It uses cheaper but considerably harder to solder parts, so it is a more advanced project than the PicoNES — if you are unsure of your soldering, start with that one instead. The current design is v2.0 (Gerber_PicoNES_Mini_PCB_v2.0.zip), which improved the SD slot and the components around the HDMI port.
Flash picosmsPlus_WaveShareRP2350ZeroWithPCB_arm.uf2. The design also exists in an RP2040-Zero flavour; flash picosmsPlus_WaveShareRP2040ZeroWithPCB_arm.uf2 for that one, but an RP2350-Zero is the better choice — see RP2040 notes.
Note
Good soldering skills are required, especially around the HDMI portion: plenty of flux, a fine tip and solder wick. The recommended order is the resistor arrays first, then the HDMI port, then the Pico or the microSD adaptor, and the NES ports last — they can be hard to push into the PCB.
The build guide and the full component list are on Instructables: https://www.instructables.com/PicoNES-RaspberryPi-Pico-Based-NES-Emulator/

Also by Gavin Knight: thingiverse.com/thing:7041536. The same page still carries the older v1.0 PCB design files, gerber and BOM. Without a printer of your own, a local printing service or a professional one such as PCBWay or JLCPCB will produce it — the professional finishes are excellent.

The smallest of the three, again by Gavin Knight: a Waveshare RP2350-USB-A board on a PCB barely larger than the USB port itself, with a single player controlling the console over USB. The current design is v1.2 (Gerber_PicoNES_Micro_v1.2.zip).
Flash picosmsPlus_WaveShare2350USBA_arm_piousb.uf2. The game controller plugs into the USB-A port; the USB-C port is for power and for flashing the firmware.
Note
There are no NES controller ports on this design, so two player Master System games cannot be played on it — the driver recognises only one USB controller.
Note
Because of the size, micro-soldering skills are required — the design uses 0603 SMD components. This is the most demanding of the three builds.
The build guide is on Instructables: https://www.instructables.com/PicoNES-RaspberryPi-Pico-Based-NES-Emulator/


The following controllers are supported.
- BUFFALO BGC-FC801
- SONY DUALSHOCK 4
- SONY DualSense
- Xinput type controllers (Xbox)
- Retro-bit 8 button Genesis-USB.
- and more...
Also original NES and WII-classic controllers are supported in some configurations.
See the Pico-InfonesPlus sister project for more info.
The emulator supports two player games using two NES controllers or an USB gamecontroller and a NES controller.
Note
You cannot use two USB controllers for two player games. At the moment only one USB controller is recognized by the driver. In this case the USB controller is always player 1. Player 2 must be a NES controller.
| Player 1 | Player 2 | |
|---|---|---|
| USB controller connected | USB | NES port 1 or NES port 2 |
| No usb controller connected | NES port 1 | NES port 2 |
Below the button mapping for different controllers. You can also use a USB-keyboard.
| (S)NES | Genesis | XInput | Dual Shock/Sense | Wii Classic | |
|---|---|---|---|---|---|
| Button1 | B (*) | A | A | X | A (**) |
| Button2 | A | B | B | Circle | B (**) |
| Button3 | X (SNES only) | C | Y | Triangle | X |
| Select | select | Mode or C | Select | Select | Select |
(*) On SNES USB-controller press Y once to activate the B-button.
(**) In a game, a Wii Classic pad follows the controller-port convention: A is Button1 and B is Button2. In the menu it follows the menu convention, where A chooses and B goes back — the same two buttons, labelled the other way round.
Button3 is a menu-only button — it opens the recently played list and does nothing in a game, so the Master System's two buttons are unaffected.
Note
An original NES controller has no Button3. Everything reachable with it can also be reached from the settings menu.
Gamepad buttons:
- UP/DOWN: Next/previous item in the menu.
- LEFT/RIGHT: next/previous page.
- Button2 : Open folder/flash and start game.
- Button1 : Back to parent folder.
- Button3 : Open the recently played list.
- START: Show metadata and box art (when available).
- SELECT: Opens a setting menu. Here you can change settings like screen mode, scanlines, framerate display, menu colors and other board specific settings. Settings can also be changed in-game by pressing some button combinations as explained below. The settings menu can also be opened in-game.
The menu keeps a list of the last 20 games you started, most recent first. Open it with Button3 in the menu, or with the Recently played entry at the top of the settings menu. That entry is only there when the settings menu is opened from the menu — a game cannot be started from inside a running game.
Note
On an original 3-button Genesis Mini controller, C acts as SELECT and opens the settings menu instead. Take the Recently played entry there.
In the list:
| Button | Action |
|---|---|
| UP/DOWN | Select a game. |
| Button2 | Start the highlighted game. |
| Button1 | Close the list and return to the menu. |
| SELECT | Remove the highlighted game from the list. Asks for confirmation first. This only removes the entry, the rom on the SD card is left alone. |
| START | Show metadata and box art (when available). |
Games are added to the list automatically when you start them, so nothing has to be enabled. Starting a game that is already in the list moves it back to the top. The list closes by itself after a minute without input.
The list is kept in /recent_SMS.txt in the root of the SD card, as plain text with one game per line. Master System and Game Gear roms share the one list. It survives a reboot and can be read, edited or deleted on a PC. Deleting the file simply empties the list, and a damaged file is treated as an empty list — unlike the settings file, nothing else is reset. Each emulator running under pico-bootLoader keeps its own list.
If a game was moved, renamed or deleted on the SD card in the meantime, the list says so instead of starting it. Use SELECT to remove such an entry.
On boards without PSRAM, one entry can be tagged [READY]. That is the game whose rom is currently written to flash, which is the one that starts without waiting for the flashing step.
Gamepad buttons:
- SELECT + START, Xbox button: opens the settings menu. From there, you can:
- Quit the game and return to the SD card menu
- Adjust settings and resume your game.
- SELECT + UP/SELECT + DOWN: switches screen modes.
- START + Button2 : Toggle framerate display
- START + DOWN : (quick) Save state. (slot 5)
- START + UP : (quick) Load state. (slot 5)
- Pimoroni Pico DV Demo Base only: SELECT + LEFT: Switch audio output to the connected speakers on the line-out jack of the Pimoroni Pico DV Demo Base. The speaker setting will be remembered when the emulator is restarted.
- Fruit Jam Only
- SELECT + UP: Toggle scanlines.
- pushbutton 1 (on board): Mute audio of built-in speaker. Audio is still outputted to the audio jack.
- pushbutton 2 (on board) or SELECT + RIGHT: Toggles the VU meter on or off. (NeoPixel LEDs light up in sync with the music rhythm)
- START + LEFT/RIGHT: Adjust volume of built-in speaker and external audio jack.
- RP2350 with PSRAM only: Record about 30 seconds of audio by pressing START to pause the game and then START + BUTTON1. Audio is recorded to /soundrecorder.wav on the SD-card.
- Genesis Mini Controller: When using a Genesis Mini 3 button controller, press C for SELECT. On the 8-button Genesis controllers, MODE acts as SELECT.
- USB-keyboard: When using an USB-Keyboard
- Cursor keys: up, down, left, right
- A: Select
- S: Start
- Z: Button2
- X: Button1
- C: Button3. In the menu this opens the recently played list.
The menu allows you to play music files. Files must meet the following requirements:
- Format: WAV
- Bit depth: 16-bit
- Sample rate: 44.1 kHz
- Channels: Stereo
- File extension:
.wav
- Select a music file from the menu.
- Press Button2 or START to start playback.
- Press Button2 or START again to stop playback.
You can easily convert MP3 files to WAV using Audacity:
- Open the MP3 file in Audacity.
- Go to File → Export → Export Audio.
- Choose the following settings:
- Format: WAV (Microsoft)
- Channels: Stereo
- Sample rate: 44,100 Hz
- Encoding: Signed 16-bit PCM
- Copy the exported WAV file to the SD card.

Download the metadata pack from the releases page It contains box art, game info and themed borders/bezels for many games. The metadata is used in the menu to show box art and game info when a rom is selected. When the screensaver is started, random box art is shown. Extra on RP2350 boards: When in-game, themed borders/bezels are shown around the game screen.
- Download pack here.
- Extract the zip contents to the root of the SD card.
- In the menu:
- Highlight a game and press START → show cover art and metadata.
- Press SELECT → show full game description.
- Press Button1 → return to menu.
- Press START or Button2 → start the game.
- RP2350-only: In-game: A themed bezel is shown:
| Master System | Game Gear |
|---|---|
 |
 |
Use the bld.sh script to build the project. Build using Ubuntu Linux or WSL on Windows. See the Pico SDK installation instructions on how to set up the build environment.
Use ./bld.sh --h for options.
The resulting .uf2 file will be in the releases/ folder. Copy it to the Pico when in bootloader mode.
This emulator is other people's work brought together on a Pico.
Emulation
- SMS Plus by Charles MacDonald — the Sega Master System and Game Gear emulator core this project is built on.
- The Z80 CPU core is Juergen Buchmueller's portable Z80 emulator.
- emu2413 by Mitsutaka Okazaki — YM2413 (OPLL) FM sound for the Japanese Master System games that use it.
Video and sound output
- pico_hdmi by @fliperama86 — the HSTX driver that carries picture and sound over HDMI on the RP2350 boards, and a great deal of help along the way.
- pico-infones by Shuichi Takano — the PicoDVI video path and the USB HID gamepad handling this project inherited.
- PicoDVI by Luke Wren (@Wren6991) — the DVI-over-HDMI implementation underneath it.
Libraries and drivers
- pico_fatfs by @elehobica, wrapping FatFs by ChaN — SD card access.
- tusb_xinput by Ryan Wendland (@Ryzee119) — Xbox controller support.
- Pico-PIO-USB by @sekigon-gonnoc — the second USB port on the boards that have one.
- lwmem by Tilen Majerle (@MaJerle) — allocator used for the PSRAM heap.
- PicoPlusPsram by Andrew Capon (@AndrewCapon) — PSRAM detection and setup.
- The (S)NES and Wii Classic controller support goes back to work by Phil Burgess (@PaintYourDragon) and Adafruit.
Hardware
- The PicoNES PCB was designed by John Edgar Park (@johnedgarpark).
- The PicoNES Mini and PicoNES Micro PCBs, and the 3D-printed cases for all of them, were designed by Gavin Knight (DynaMight1124).
- The metadata pack — the box art, game info and themed borders/bezels on the SD card — was put together by Gavin Knight (DynaMight1124).
- Murmulator M1 and M2 support was contributed by @javavi.
- Thanks to @Layer812 for testing the I2S audio output and providing feedback.
This project
- pico-smsplus — the port to the Pico, the menu, the settings screen and the board support — is by Frank Hoedemakers (@fhoedemakers).
- The menu, settings, controller handling and board configurations are shared with pico-infonesPlus and the other emulators in the family through pico_shared.
- Part of the code and documentation was written with the assistance of Claude Code, Anthropic's agentic coding tool.