pico-bootLoader is a bootloader for RP2350 boards. Its primary purpose is to host a collection of retro-game emulators and native ports of Doom and Duke Nukem 3D on a single board and to let the user choose which one to run from an on-screen menu, without reconnecting the board to a computer.
It runs on nine board configurations, each with its own ready-made binary — see Supported hardware for the file names:
- Raspberry Pi Pico 2 / Pico 2 W, or a Pimoroni Pico Plus 2, with an Adafruit DVI breakout and a microSD breakout — or the PicoNES PCB that replaces that wiring
- Raspberry Pi Pico 2 / Pico 2 W on a Pimoroni Pico DV Demo Base
- Adafruit Fruit Jam
- Adafruit Metro RP2350
- Adafruit Feather RP2350 with a TLV320DAC3100
- Waveshare RP2350-Zero with the PicoNES Mini PCB
- Waveshare RP2350-PiZero
- Waveshare RP2350-USB-A, optionally on the PicoNES Micro PCB
- Murmulator M2
Every one of them outputs video over DVI/HDMI and reads its applications from an SD card. RP2040 boards are not supported: the flash layout and the UF2 checks are RP2350-specific. The three PCBs are optional console-style carriers for boards already in this list — see Custom PCBs.
It is not limited to emulation, though: any RP2350 application can be made bootable and added to the menu — see Creating a bootable build of your own application.
An RP2350 board normally holds a single program. Running a different one means
connecting it to a PC, holding BOOTSEL, and copying a new .uf2 over USB.
pico-bootLoader replaces that procedure: the applications are placed on the
board's SD card once, and from then on every power-on presents a menu. The menu
is navigated with a USB game controller or a USB keyboard, in either a graphical
mode with full-screen artwork per application or a plain text mode. Selecting an
entry flashes the corresponding application (if it is not already resident) and
starts it. A hardware reset or power cycle always returns to the menu.
Doom and Duke Nukem 3D are included as native RP2350 ports — they are not emulated.
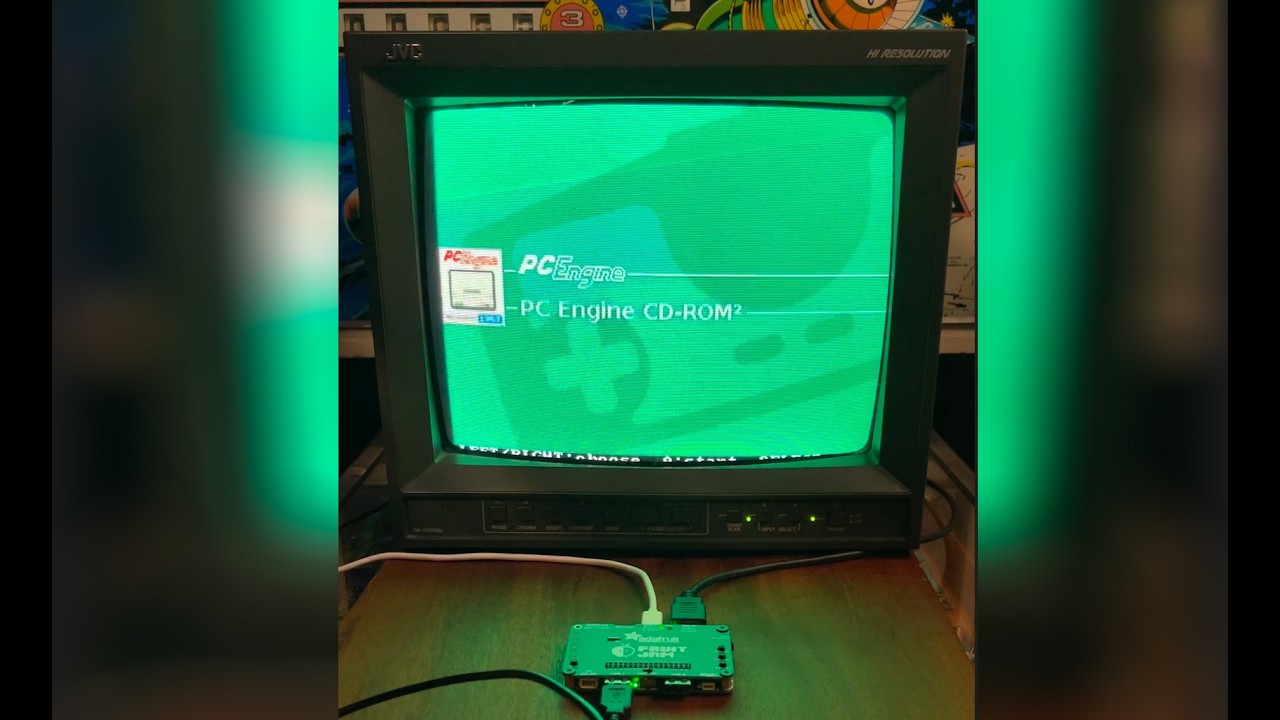
Click the image below to watch pico-bootLoader in action.
The following emulators and native ports are supported. Each is built from
its own repository and identified by the program name embedded in its .uf2.
| System | Program name | Source repository | Menu artwork |
|---|---|---|---|
| Nintendo Entertainment System | piconesPlus |
pico-infonesPlus |  |
| Super Nintendo Entertainment System | picosnesPlus |
pico-snesPlus |  |
| Sega Genesis / Mega Drive | picogenesisPlus |
pico-genesisPlus |  |
| NEC PC Engine / PCEngine CD | picopcePlus |
pico-pcePlus |  |
| Nintendo Game Boy / Game Boy Color | PicoPeanutGB |
pico-peanutGB |  |
| Sega Master System / Game Gear | picosmsPlus |
pico-smsplus |  |
| Philips Videopac / Magnavox Odyssey² | picoPacPlus |
pico-pacPlus |  |
| Doom (native port, not emulated) | doom_tiny |
pico-doom |  |
| Duke Nukem 3D (native port, not emulated) | duke3d_game |
pico-duke3D |  |
The following emulators need a bios in /bios on SD:
- Nintendo Entertainment System : For Famicom Dsik System games
fds-bios.rom - Philips Videopac / Magnavox Odyssey²:
o2rom.bin - PCEngine CD :
Super CD-ROM System (Japan) (v3.0).pceor another variant.
Doom runs on four boards: Adafruit Fruit Jam (HW_CONFIG 8), the Adafruit DVI +
MicroSD breakout combination (2), Murmulator M2 (13) and Adafruit Feather RP2350
with a TLV320DAC3100 (14). It ships in two variants: doom_tiny, the shareware
episode, distributed as the engine .uf2 together with a companion WAD data
image (see Auxiliary data images); and
doom_tiny_full, registered/Ultimate DOOM, which carries no WAD in flash and
instead reads /roms/doom/doom.whd from the SD card at boot, so it needs a board
with PSRAM.
Duke Nukem 3D runs on three boards: Adafruit Fruit Jam (HW_CONFIG 8), the
Adafruit DVI + MicroSD breakout combination (2, on a Pimoroni Pico Plus 2) and
Murmulator M2 (13). It needs PSRAM on all three. There is no companion data
image: DUKE3D.GRP — shareware or registered/Atomic — is streamed from
/roms/duke3d/ on the SD card, with savegames and duke3d.cfg written next to
it. Only the Fruit Jam has been tested on hardware; boards 2 and 13 build clean
but are untested.
PCEngine CD needs PSRAM
Additional emulators may be added over time.
For board-by-board wiring, supported display modes and more refer to the pico-infonesPlus documentation. The set of supported boards and their pinouts is identical between the two projects.
The bootloader resides at the start of flash, so the RP2350 bootrom always runs it first. On each boot it:
- Reads the optional
/boot.txt, the index file, and scans the board's application folder on the SD card (<BASEDIR>/<HW_CONFIG>/*.uf2). - Reads each
.uf2's embedded program name from itsbinary_infoon disk — nothing is flashed to do this — and reads the resident application's name via XIP. - Filters the files against the index (an allow-list), then displays the menu and pre-selects the entry that matches the application currently in flash.
- On selection:
- if the chosen application is already resident, it is started with a VTOR jump — no flash operation and no SD I/O, so the launch is near-instant;
- otherwise the application is flashed into the application partition, with a progress indicator, and then started;
- if the copy on the SD card differs from the resident image (a CRC mismatch, for example after a newer build was placed on the card), it is re-flashed before starting.
The bootloader only ever jumps to an application; it never transfers the boot vector. Consequently it cannot be locked out: any reset or power cycle returns to the menu, and flashing a defective application costs nothing more than another selection.
The flash memory map (16 MB flash, Adafruit Fruit Jam shown) is:
0x10000000  Bootloader             512 KB   <- the bootrom always runs this
0x10080000  Application partition  15.5 MB  <- the selected app is flashed and started here
0x11000000  end of flash
The menu is operated with USB Human Interface Devices. All connected input devices are active simultaneously.
- USB game controller — standard USB HID gamepads and XInput controllers.
- USB keyboard — a standard USB HID keyboard.
On boards that provide the necessary wiring, NES/SNES controller ports and a Wii Classic controller (over I²C) are also supported and use their own buttons.
| Action | Game controller | USB keyboard |
|---|---|---|
| Move through the list (text mode) | D-pad UP / DOWN | ↑ / ↓ |
| Slide between applications (graphical mode) | D-pad LEFT / RIGHT | ← / → |
| Change artwork theme (graphical mode) | D-pad UP / DOWN | ↑ / ↓ |
| Launch the selected application | A | Z |
| Toggle text / graphical mode | SELECT | A |
| Open the help screen | START | S |
| Wake from screensaver | any button | any mapped key |
START is used for the help screen because it is the only spare button present on every supported input device, including NES controllers.
The chosen menu mode and artwork theme are remembered across boots. Inside a running emulator built on the shared framework, SELECT + START opens its menu, which offers Return to emulator selection to reboot back into this menu.
- Flash the bootloader. Download the loader
.uf2for your board from the Releases page (see Supported hardware for the file names). Hold BOOTSEL, connect the board over USB, and copy the.uf2onto theRP2350drive. - Prepare the SD card. Download
pico-bootLoader_sdcard.zipfrom the same Releases page and unpack it onto a FAT32- or exFAT-formatted card. The archive contains the emulators, the native ports, the menu artwork, and a sample configuration file. Alternatively, assemble the layout yourself as described in SD card layout. - Run it. Insert the card and power on the board. The menu appears.
The Releases page provides two kinds of download: the per-board bootloader
.uf2 binaries and the pico-bootLoader_sdcard.zip SD-card archive.
Release tags say which of the two changed:
| Tag | What changed | What you need to do |
|---|---|---|
v0.N |
bootloader firmware | re-flash the board and refresh the SD card |
v0.N.M |
emulator binaries only | replace /emu on the SD card; no re-flash needed |
Every release lists the exact emulator versions its archive ships, and the same
table is in /emu/versions.txt on the card.
Only RP2350 boards are supported; the partition scheme and the UF2 family checks
are RP2350-specific. The board is selected at compile time through the
HW_CONFIG value (defined in
pico_shared/BoardConfigs.cmake). The same
number names the SD-card folder the loader reads applications from
(<BASEDIR>/<HW_CONFIG>/).
| HW_CONFIG | Board | Bootloader binary |
|---|---|---|
| 1 | Pimoroni Pico DV Demo Base (Pico 2 / Pico 2 W) | pico-bootLoader_PimoroniDVI_pico2_arm.uf2 / ..._pico2_w_arm.uf2 |
| 2 | Adafruit DVI + microSD breakout, or the PicoNES PCB (Pico 2 / Pico 2 W / Pimoroni Pico Plus 2) | pico-bootLoader_AdafruitDVISD_pico2_arm.uf2 / ..._pico2_w_arm.uf2 |
| 5 | Adafruit Metro RP2350 | pico-bootLoader_AdafruitMetroRP2350_arm.uf2 |
| 6 | Waveshare RP2350-Zero with the PicoNES Mini PCB | pico-bootLoader_WaveShareRP2350ZeroWithPCB_arm.uf2 |
| 7 | Waveshare RP2350-PiZero | pico-bootLoader_WaveShareRP2350PiZero_arm_piousb.uf2 |
| 8 | Adafruit Fruit Jam | pico-bootLoader_AdafruitFruitJam_arm_piousb.uf2 |
| 9 | Waveshare RP2350-USB-A (optionally on the PicoNES Micro PCB) | pico-bootLoader_WaveShare2350USBA_arm_piousb.uf2 |
| 13 | Murmulator M2 | pico-bootLoader_MurmulatorM2_arm.uf2 |
| 14 | Adafruit Feather RP2350 (TLV320DAC3100 audio) | pico-bootLoader_AdafruitFeatherRP2350_TLV320DAC3100_arm_piousb.uf2 |
Video output is DVI/HDMI on all boards. Boards whose video connector is wired to the RP2350 HSTX pins — HW_CONFIG 2, 5, 8, 13 and 14 — drive it through the HSTX peripheral; the others use PicoDVI. A single SD card serves both kinds — artwork is cached in both pixel formats (see Artwork).
Three community PCB designs turn a supported board plus its breakouts into a
finished console, each with an optional 3D-printed case. Every one of them is
just a neater way to build a hardware configuration the loader already supports,
so nothing about the firmware changes: flash the binary for that HW_CONFIG and
put the applications in the matching /emu/<HW_CONFIG>/ folder.
| Design | Board it carries | HW_CONFIG | Gerber archive | Designed by |
|---|---|---|---|---|
| PicoNES | Pico 2, Pico 2 W or Pimoroni Pico Plus 2 | 2 | pico_nesPCB_v2.6.zip |
John Edgar Park |
| PicoNES Mini | Waveshare RP2350-Zero | 6 | Gerber_PicoNES_Mini_PCB_v2.0.zip |
Gavin Knight |
| PicoNES Micro | Waveshare RP2350-USB-A | 9 | Gerber_PicoNES_Micro_v1.2.zip |
Gavin Knight |
All three archives are attached to every
release of this
project and also live in
pico_shared/PCB.
Upload the zip as-is to a PCB manufacturer of your choice;
PCBWay and JLCPCB are both good options.
The designs come from pico-infonesPlus and keep its NES-flavoured names, but there is nothing NES-specific about them — they are DVI, microSD and controller wiring, and every application in the menu runs on them.
The Waveshare RP2350-PiZero (HW_CONFIG 7) needs no PCB, since it already carries its own HDMI and microSD connectors, but it has a matching NES-like case: thingiverse.com/thing:6758682, designed for two NES controller ports.
Note
Sellers on AliExpress have copied the PicoNES design and sell pre-populated boards. For questions about those, contact the seller.
The original design, by @johnedgarpark. It
carries the Pico, the DVI and microSD breakouts and up to two NES controller
ports. It is also the only one of the three that takes an interchangeable
Pico-format board, which is what makes a Pimoroni Pico Plus 2 — and with it
PSRAM and 16 MB of flash — an option. The current design is v2.6; it runs
the AdafruitDVISD loader binary and reads its applications from /emu/2/.

Design v2.6 added through-holes, so there are now two ways to fit the board:
| Mounting | Boards | Design version |
|---|---|---|
| Soldered flat onto the PCB, no headers | Pico 2, Pico 2 W | any |
| Male headers plugged into the through-holes | Pico 2, Pico 2 W, Pimoroni Pico Plus 2 | v2.6 or later |
Important
A Pimoroni Pico Plus 2 needs v2.6 and male headers. On v2.1 and older designs the board has to lie flat against the PCB, which the SP/CE connector on the back of the Pimoroni Pico Plus 2 prevents.
Note
Soldering skills are required. Solder every connection from the Pico to the PCB, including the ones on the short right-hand side of the board — those are ground.
- One of the following, mounted as described above:
- Raspberry Pi Pico 2 or Pico 2 W without headers, soldered flat.
- Raspberry Pi Pico 2, Pico 2 W or Pimoroni Pico Plus 2 with male headers soldered on (these fit), plugged into the through-holes.
- Adafruit DVI Breakout Board — For HDMI Source Devices
- Adafruit Micro SD SPI or SDIO Card Breakout Board — 3V ONLY!
- For NES controllers:
- Micro USB to OTG Y-cable if you want to use a USB game controller — it powers the board and connects the controller at the same time.
- Micro USB power supply.
- Optional: an on/off switch, such as this one.
Two NES controllers give a two-player setup; a USB controller for player 1 and a NES controller in either port for player 2 works just as well.
Note
The ports also speak the SNES protocol, so SNES controllers work as well. Only the connectors differ, so each port needs an adapter cable — see here how to make one. Ready-made adapters are sold on AliExpress, but they do not always work and are not recommended.

- Pico 2 and Pimoroni Pico Plus 2 —
pico-bootLoader_AdafruitDVISD_pico2_arm.uf2 - Pico 2 W —
pico-bootLoader_AdafruitDVISD_pico2_w_arm.uf2
The Pimoroni Pico Plus 2 needs no separate build. The loader reads the real
flash size from the chip at boot and detects PSRAM at runtime, so the same
pico2 image adapts to whichever of the two is plugged in.
The Pimoroni Pico Plus 2 brings 16 MB of flash and 8 MB of PSRAM, and both change what the menu can offer:
- Flash. The application partition is whatever is left after the loader's 512 KB — 15.5 MB on a Pimoroni Pico Plus 2, but only 3.5 MB on a 4 MB Pico 2. An application that does not fit is simply not listed in the menu rather than reported as an error, so on a Pico 2 some entries are missing. Doom! is the clearest case: its engine plus the companion WAD image needs about 4.3 MB.
- PSRAM. The entries that require it — Duke Nukem 3D, PCEngine CD and
doom_tiny_full— are the Pimoroni Pico Plus 2's alone; neither Pico 2 has PSRAM. See Bootable applications.
Gavin Knight (DynaMight1124) designed an NES-like enclosure for this PCB: thingiverse.com/thing:6689537. The v2.0 design has a base, a power-switch part and a choice of two top covers — one with a button that reaches the BOOTSEL button so firmware can be updated without opening the case, one without. Print the files that match the PCB version you own; Gavin's Thingiverse page has the details.
Important
If the Pico is mounted with male headers, download the latest top cover. Headers raise the Pico, and only the newest cover leaves room for the USB cable — the older ones assume a Pico soldered flat onto the PCB.

For the full photo gallery and assembly detail, see the PCB section of the pico-infonesPlus documentation.
A smaller take on the same idea by Gavin Knight
(DynaMight1124), built around a Waveshare
RP2350-Zero and two NES controller ports. It uses cheaper but considerably
harder to solder parts, so it is a more advanced project than the PicoNES — if
you are unsure of your soldering, start with that one instead. The current
design is v2.0 (Gerber_PicoNES_Mini_PCB_v2.0.zip), which improved the SD
slot and the components around the HDMI port.
Flash pico-bootLoader_WaveShareRP2350ZeroWithPCB_arm.uf2 and put the
applications in /emu/6/. The design also exists in an RP2040-Zero flavour,
which this bootloader cannot use — it is RP2350-only.
Note
Good soldering skills are required, especially around the HDMI portion: plenty of flux, a fine tip and solder wick. The recommended order is the resistor arrays first, then the HDMI port, then the Pico or the microSD adaptor, and the NES ports last — they can be hard to push into the PCB.
The build guide and the full component list are on Instructables: https://www.instructables.com/PicoNES-RaspberryPi-Pico-Based-NES-Emulator/

Also by Gavin Knight: thingiverse.com/thing:7041536. The same page still carries the older v1.0 PCB design files, gerber and BOM. Without a printer of your own, a local printing service or a professional one such as PCBWay or JLCPCB will produce it — the professional finishes are excellent.

The smallest of the three, again by Gavin Knight: a Waveshare RP2350-USB-A board
on a PCB barely larger than the USB port itself, with a single player
controlling the console over USB. The current design is v1.2
(Gerber_PicoNES_Micro_v1.2.zip).
Flash pico-bootLoader_WaveShare2350USBA_arm_piousb.uf2 and put the applications
in /emu/9/. The game controller plugs into the USB-A port; the USB-C port is
for power and for flashing the firmware.
Note
Because of the size, micro-soldering skills are required — the design uses 0603 SMD components. This is the most demanding of the three builds.
The build guide is on Instructables: https://www.instructables.com/PicoNES-RaspberryPi-Pico-Based-NES-Emulator/


/boot.txt                                  configuration (created/updated by the menu)
/emu/                                      BASEDIR (default /emu, override in boot.txt)
/emu/<HW_CONFIG>/*.uf2                     applications for this board (e.g. /emu/8/)
/emu/emulators.txt                         the index / allow-list (name set by INDEX)
/emu/versions.txt                          which version each application was built from (informational)
/emu/assets/themes/0/<image_key>.png|.jpg  default artwork theme, converted on first use
/emu/assets/themes/1..9/                   optional extra themes (UP/DOWN to switch)
/emu/assets/screensaver/*.png|.jpg         screensaver images (optional, not themed)
Applications live in a subfolder named after the board's HW_CONFIG number, so
one card can carry builds for several boards side by side.
A file in the root of the SD card. If it is absent, the defaults below
apply. A commented sample ships in the repository root: boot.txt.
- One
KEY=VALUEper line; whitespace around=and the value is trimmed. - Lines starting with
#or;are comments; blank lines are ignored. - Keys are case-insensitive.
SCREENSAVERvalues are case-insensitive;BASEDIR/INDEXvalues are filesystem paths and case-sensitive. - A malformed file (unknown key, duplicate key, missing
=or value) produces an on-screen error at boot — correct the file and reset.
| Key | Default | Meaning |
|---|---|---|
BASEDIR |
/emu |
Absolute SD path (must start with /, max 63 characters) under which everything lives: application folders, the index, artwork, screensaver images. |
INDEX |
emulators.txt |
Bare file name (no slashes) of the index file inside BASEDIR. |
SCREENSAVER |
see note | STARFIELD — images fly outward from the screen centre, growing toward the camera. BLOCKS — images float and bounce off the edges; the on-screen set is re-picked every 15 s. The screensaver starts after ~30 s of inactivity and any button press exits it. |
GUI |
1 |
0 = text menu, 1 = graphical menu. Rewritten whenever SELECT toggles the mode. Replaces the .guimode file used by earlier releases, which is migrated and deleted automatically. |
THEME |
0 |
Active artwork theme, 0–9 — see Artwork themes. Rewritten whenever UP/DOWN changes the theme in graphical mode. A theme that is not on the card falls back to 0. |
Screensaver default. When
/boot.txtis absent the default isSTARFIELD; when the file is present but the key is omitted, it isBLOCKS. Set the key explicitly if the choice matters.
The bootloader writes this file. Changing the menu mode or the artwork
theme rewrites the corresponding GUI= / THEME= line. Nothing else is
touched: comments, blank lines, key order, spacing and any other keys are
copied through unchanged, so the file stays yours to edit. If /boot.txt does
not exist, the first such change creates it with the current effective value of
every key — SCREENSAVER included, so that materialising the file cannot
quietly change the screensaver through the asymmetry noted above.
Updates are written to /boot.txt.tmp, re-parsed to confirm they are valid,
and only then renamed into place; if a power cut interrupts the rename, the
next boot adopts the .tmp. A card that cannot be written to (write-protected
or full) is not an error — the change applies for the session and the help
screen reports that it was not saved.
<BASEDIR>/<INDEX> — by default /emu/emulators.txt — determines what appears
in the menu. Only .uf2 files whose embedded program name matches a row are
listed; anything else in the application folder is ignored. One row per
application:
<program_name>;<image_key>;<display_name>[;<aux_uf2>]
# program_name  ; image_key ; display_name              ; optional aux data uf2
piconesPlus     ; nes       ; Nintendo Entertainment System
picogenesisPlus ; md        ; Sega Genesis/Mega Drive
doom_tiny       ; doom      ; Doom!                     ; doom1-whx.uf2
- Fields are separated by
;, whitespace is trimmed, and#starts a comment line. A maximum of 16 rows is allowed. program_name(max 32 characters) — matched case-insensitively against the name each.uf2embeds viapico_set_program_name()(read from itsbinary_info, without flashing anything). The.uf2file name is irrelevant; files may be renamed freely.image_key(max 16 characters) — basename of the menu artwork:<BASEDIR>/assets/<image_key>.png(or.jpg/.jpeg).display_name(max 40 characters) — the label shown in the menu.aux_uf2(optional, max 64 characters) — file name of a companion data.uf2in the same<BASEDIR>/<HW_CONFIG>/folder, flashed alongside the application (see Auxiliary data images).
Ordinary images are placed on the card and converted by the bootloader itself:
- Menu artwork —
<BASEDIR>/assets/themes/<N>/<image_key>.png|.jpg|.jpeg, one per index row, shown full-screen in graphical mode.<N>is the theme number; theme0is the default — see Artwork themes. - Screensaver images — any
*.png|.jpg|.jpegin<BASEDIR>/assets/screensaver/(file names do not matter; more images give more variety). These are not themed.
On first use each source image is converted and cached next to it as
<name>.444 (RGB444, used by PicoDVI boards) and <name>.555 (RGB555, used by
HSTX boards). Both are always written, so the same card works in every supported
board. The .444/.555 files must not be authored by hand; when a source image
is replaced under the same name, its stale .444/.555 files should be deleted
so they regenerate.
The released SD-card archive ships the cached .444/.555 files rather than the
source images — they are far smaller, and shipping both would roughly double the
download. Where a theme has no cache for an entry, its source image ships instead
and the first boot converts it, so nothing in the menu is ever left without
artwork.
| Menu artwork | Screensaver | |
|---|---|---|
| Accepted formats | PNG, baseline JPEG | PNG, baseline JPEG |
| Maximum source size | 1280 × 960 | 1280 × 960 |
| Rendered as | scaled down (never up) to fit, letterboxed on black to 320 × 240 | scaled down to fit 80 × 60 |
| Recommendation | 4:3 aspect (e.g. 320 × 240 or 640 × 480) to avoid black bars | small and legible — it moves around the screen |
Progressive JPEG, interlaced PNG, 16-bit PNG, and oversized images are not
supported; they are skipped and moved to an unsupported/ subfolder so they are
not retried on every boot. Re-export as baseline/non-interlaced 8-bit and copy
again.
Boards with PSRAM convert images lazily, as they first appear on screen. Boards without PSRAM convert everything in one batch during boot, for every theme on the card, not just the active one — the converter needs SRAM that is no longer free once the menu is running, so a theme cannot be converted at the moment you switch to it. The first boot after adding images takes noticeably longer, after which the cache makes it immediate.
The graphical menu can carry up to ten sets of artwork. Each is a folder:
/emu/assets/themes/0/     theme 0 — the default, and the fallback
/emu/assets/themes/1/     theme 1
...                       up to theme 9
A theme folder holds one image per application, named after the image_key
from the index file — so a theme might contain nes.png, md.png, doom.png.
Only the folders that exist are used; the numbers need not be contiguous.
Switching — press UP or DOWN in the graphical menu. Only themes that are
actually on the card are reachable, so with themes 0, 1 and 3 present,
UP/DOWN cycles 0 → 1 → 3 → 0. The choice is saved to THEME= in
/boot.txt immediately and restored on the next boot.
UP/DOWN keep their usual meaning (choosing an application) in text mode, where
artwork is not shown.
Incomplete themes are fine. An application the active theme has no image for falls back to theme 0's image, and to a black screen if theme 0 has none either. A theme can therefore restyle just a few entries.
Existing cards are migrated automatically. Releases before v0.2 kept menu
artwork loose in <BASEDIR>/assets. On the first boot the bootloader creates
assets/themes/0 and moves those image files into it — including the cached
.444/.555 files, so nothing has to be re-converted. The screensaver/
folder and any other subfolder are left alone, as are files that are not
images. The move is resumable: if it is interrupted, the next boot finishes it.
Press START in either menu mode for a full-screen summary of the controls,
the meaning of the * and ! markers, and the current mode, theme, board
configuration and index file. Press START, the launch button, B or SELECT to
return. It is also where a failed configuration write is reported.
Any RP2350 application built for the application partition can appear in the
menu — it need not be an emulator. Making one bootable requires compiling its
.uf2 to the loader's layout and adding it to the SD card.
A normal Pico SDK application links at 0x10000000. For the bootloader it must
be relinked into the application partition at 0x10080000. Three changes to the
build are required.
Give the application a name — the loader identifies applications by it:
pico_set_program_name(${projectname} "my_app")Relink into the application partition. Add the following near the end of the
CMakeLists.txt (after the target exists, before pico_add_extra_outputs),
with BootPartition.cmake taken from the
pico_shared repository:
if(BUILD_FOR_BOOTLOADER)
    include("pico_shared/BootPartition.cmake")
    frens_offset_for_bootloader(${projectname})
endif()
Build as a secure-Arm RP2350 image (the default SDK Arm build). The loader
only flashes UF2 blocks with family RP2350 ARM_S (0xe48bff59):
mkdir build && cd build
cmake -DCMAKE_BUILD_TYPE=Release -DPICO_BOARD=pico2 \
      -DPICO_PLATFORM=rp2350-arm-s -DBUILD_FOR_BOOTLOADER=ON ..
make -j
Applications based on pico_shared can use its build script instead:
./bld.sh -2 -c <HW_CONFIG> -b (the -b switch passes
-DBUILD_FOR_BOOTLOADER=ON).
The loader validates every image before erasing anything: UF2 magic, family ID,
page alignment, and that every block lands inside the application partition. A
standalone build still linked at 0x10000000 is rejected on-screen and can
never overwrite the bootloader. The rejection screen names the problem — the
address the image was actually linked at, the family it was built for, or that
the file is corrupt — and repeats the build flags above; press any button to
return to the menu.
Copy the .uf2 to <BASEDIR>/<HW_CONFIG>/ and add a row to the index file
(emulators.txt) with the program name set in step 1, an image_key, and a
display name. See The index file.
- Menu image — place
<image_key>.png(or.jpg/.jpeg) in<BASEDIR>/assets/themes/0/, using theimage_keyfrom the index row. It is shown full-screen in graphical mode. Add the same file name to any otherthemes/<N>/folder to give the application a different look in that theme; themes you skip fall back to this one. - Screensaver images — place any
*.png|.jpg|.jpegin<BASEDIR>/assets/screensaver/.
Conversion is automatic; the format and size constraints are those listed under Artwork.
For payloads too large to embed in the application (game data, filesystems), a
second .uf2 with family RP2350 DATA (0xe48bff58) can target free flash
above the application. Name it in the index row's fourth field and the loader
flashes it alongside the application, skipping the write when the CRC already
matches. Doom is distributed this way: the engine (doom_tiny.uf2, ARM_S)
plus the WAD (doom1-whx.uf2, DATA).
Optionally, an application can detect that it was started by the loader and offer
a "return to menu" action. The protocol uses two watchdog scratch registers,
which survive watchdog_reboot() but are cleared on power cycle:
scratch[6] == 0xB007ED01— set by the loader immediately before starting the application ("you were launched from the bootloader").scratch[7] = 0xB007BACE— set by the application, followed by a watchdog reboot ("show the menu instead of resuming").
With pico_shared these are Frens::isLaunchedFromBootloader() and
Frens::rebootToBootloader()
(pico_shared/FrensHelpers.h); its SELECT + START
menu shows Return to emulator selection automatically. Without pico_shared,
the raw equivalent is:
#include "hardware/watchdog.h"

bool launched_by_loader = (watchdog_hw->scratch[6] == 0xB007ED01u);

void return_to_menu(void) {
    watchdog_hw->scratch[7] = 0xB007BACEu;
    watchdog_reboot(0, 0, 0);
}mkdir build && cd build
cmake -DCMAKE_BUILD_TYPE=Release -DPICO_BOARD=pico2 -DHW_CONFIG=8 \
-DPICO_PLATFORM=rp2350-arm-s -DENABLE_PIO_USB=1 -DUSE_PICO_EXTRAS_I2S=0 ..
make -j
# -> build/pico-bootLoader.uf2 (flash via BOOTSEL)The wrapper ./bld.sh -2 -c <HW_CONFIG> performs the same build (add -w for
Pico 2 W). ./buildAll.sh builds every supported board into releases/
(requires picotool).
The image must fit the 512 KB bootloader region; the linker errors out if it
does not, and every link prints its occupancy. Most configurations sit near
265 KB (~51%), but the Pico 2 W builds pull in the CYW43 driver and land around
497 KB (~97%), leaving about 15 KB free — that is the configuration to check
when adding code. It is tight enough that the whole project is compiled -Os;
-O2 no longer links for Pico 2 W (see the comment in CMakeLists.txt).
To build the emulators and the native ports themselves,
build_emulators.sh clones each source repository and
produces the bootloader-format .uf2 files, placing them under emu/<HW_CONFIG>/.
By default each repository is built from its latest release tag, with the tag
stamped into that repository's own pico_shared/menu.h SWVERSION so the
emulator reports its version instead of a build date. -B asks interactively for
a branch instead, and -m builds each repository's default branch; neither
stamps a version.
pico_sharedis taken frommain, not from the revision the tag pins. Tag mode builds each emulator's tagged source againstpico_sharedmain; every other submodule stays at the revision the tag pins, andemu/versions.txtrecords both refs. The reason is historical:bld.shonly learned-b(BUILD_FOR_BOOTLOADER) inpico_sharedf2c8be9, and the emulator release tags of the time predated it — their pinnedpico_sharedrejected-boutright, so no bootloader-format.uf2could be produced from it. As of the v0.4 tag set the substitution is a no-op: every emulator tag pins3e19ce0, a descendant off2c8be9, which is also wheremainsits, so the two columns ofemu/versions.txtnow agree. They will differ again whenever a repository is tagged against an olderpico_shared, which is what the behaviour is for.
The native ports are the exception to all of the above. Neither
pico-doom nor
pico-duke3D has a pico_shared,
so there is no SWVERSION to stamp, and both build through their own per-board
<board>-build-forbootloader.sh scripts rather than bld.sh. Each targets only
the boards it has a script for — Doom 2, 8, 13 and 14, Duke Nukem 3D 2, 8 and
13 — and is reported as SKIP for every other configuration.
Both repositories are tagged and are built from their latest tag like the
emulators, so versions.txt records a real version for doom_tiny,
doom_tiny_full and duke3d_game. They use the same v*.* convention, so later
tags are picked up with no change here. The SCRIPTED_BRANCH table in
build_emulators.sh — main for Doom,
fix/audio-production-rate for Duke Nukem 3D — is now only the fallback for a
repository that has no tag at all.
Doom additionally needs PICO_EXTRAS_PATH pointing at a
pico-extras checkout, since it
resolves its whole toolchain from the environment. Without it the two Doom
variants are skipped with that reason and everything else — Duke Nukem 3D
included — still builds.
./build_emulators.sh -c 8            # one board, latest tags
./build_emulators.sh -c all -j 3     # every board
./build_emulators.sh -c all -j 3 -z  # ... and pack the SD-card archive
./build_emulators.sh -c 8 -B         # pick a branch interactively
-z writes emu/versions.txt — the manifest of what each
emulator was built from, one <program_name>;<repo>;<ref>;<pico_shared> row per
shipped emulator — and packs
releases/pico-bootLoader_sdcard.zip via
.github/scripts/pack_sdcard.sh. The packer
takes the emu/ tree as its only source of truth and refuses to build an archive
containing an empty .uf2, so a half-finished build cannot ship. It requires
-c all, since an archive built from one board would be missing the others.
The loader .uf2s are built by CI; the SD-card archive is built locally, because
it needs all nine emulator toolchains. An emulator-only refresh still gets its own
release so users find out about it — that is what the v0.N.M form is for.
The full maintainer checklist — per-scenario steps, dry runs, verification and
rollback — is in RELEASING.md. The short version:
./build_emulators.sh -c all -j 3 -z            # emulators + archive (local)
git add emu/versions.txt && git commit -m "Refresh emulator bundle" && git push
gh workflow run BuildAndRelease.yml -f tag=v0.2.1   # builds loader, creates tag, publishes
gh release upload v0.2.1 releases/pico-bootLoader_sdcard.zip- Menu and screensaver artwork is taken from Ducalex — retro-go (github.com/ducalex/retro-go).
- The emulator cores and the native ports are the work of their upstream authors; see the repository links under Bootable applications.
- The PicoNES PCB was designed by John Edgar Park.
- The PicoNES Mini and PicoNES Micro PCBs, and the 3D-printed cases for all three designs and for the Waveshare RP2350-PiZero, were designed by Gavin Knight, who also contributed additional artwork and testing of the loader.
- This project was developed with the assistance of AI (Anthropic Claude / Claude Code).
This project is licensed under the GNU General Public License, version 3. See
the LICENSE file for the full text.