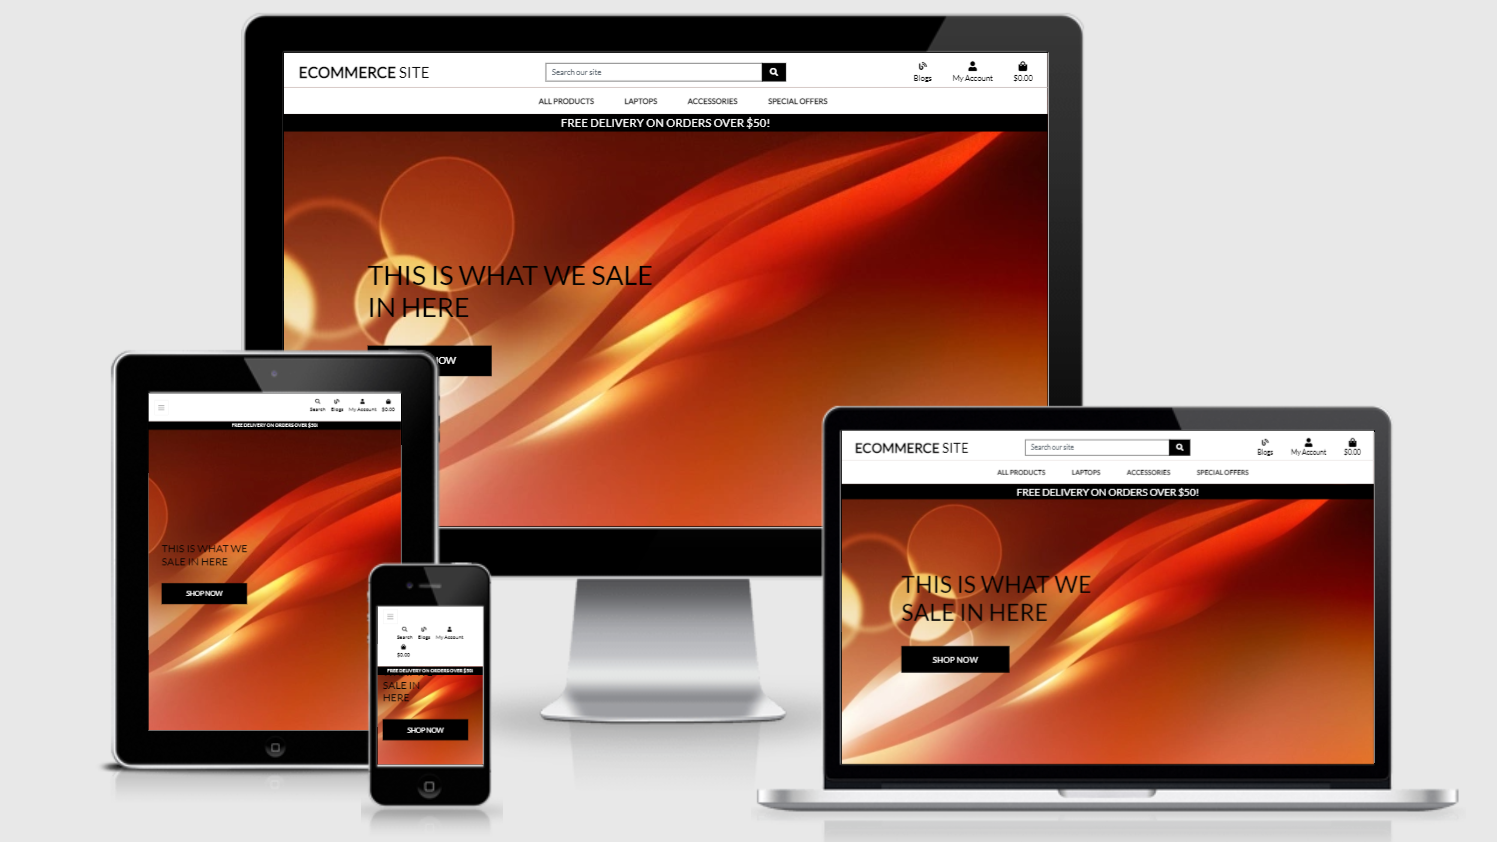
Have you ever gone to a store full of computers and all computer accessories, reaching there when you even don't know what you want to take. Being asked lots of quetions but is more of beter to make it easire for people to access each and every stuff they would like to get or to buy while sitted at home on there computers or other gadgets to access what ever they want. This case they ask you which type of part and or computer you would like to take, which specifications would you like yet you know nothing but in this case everything is easy to buy online.
The E-Commerce-Site will help and make your life more esier. How By just sitting down and start searching for each and everything and even knowing which kind is good and there prices as well.
Therefore in case you dont buy online it will be easy for you to know which kind of machine you like and what ever they ask you about you know exactly because you took time to search on web and find precisely what you wanted to do. So here you will be able to register and also signin so that all the items you bye are easily followed and you also get a bonus of creating an account.
Thanks for visiting my project.
E-Commerce_Blog Website: https://kellyd-ecommerce-blog.herokuapp.com/
E-Commerce_Blog is an ecommerce website where customer can buy Laptops and other accessories via the website. The website will provide easy access and purchasing made simple with a secure confirmation order. The users will be able to provide reviews on products and rate them also this will help with the most popular items on the website. The users will be able to provide like/dislike in relation to products and see other shopper's input as this will help with identify the most popular items on the website. The website will provide the latest Laptops with excellent prices. The website will allow users to register with the website and make purchases and store the order information. The site hosts a celebrity blog to help engage users and upsell products. Users can add comments to these blogs and update their entries if they realize they have entered a typo. Blog entries could also be used to announce special deals.
- The website has to work well on all kind of devices like mobile phones, tables and desktops.
- I want to have a clear dashboard where I can see all the different logs I have created.
- The log should appear with the most recent one on top to be relevant.
- I would like to have the option to add multiple Items.
- The website has to be easy to use and easy to update information
- Visually appealing website
- As a user, I would like to be able to register for the website so I can have my personal environment.
- As a user, I want to login after I created an account and see my previous inserted information.
- As a user, I would like to have a personal profile for my items.
- As a user, I would like to track activity, food and weight.
- As a user, I want to be able to add as many logs as I want, even multiple per day.
- As a user, I would like to have a dashboard where I can have a good overview.
- As a user, I want to be able to search on date to get specific data.
- As a user, I want to be able to add special notes to the log whenever relevant.
- As a user, I want to be able to add another product bought.
- As a user, I want to be able to edit the product profile.
- As a user, I want to have the possibility to edit a log when I made a mistake or want to add/delete some info.
- As a user, I want to have the possibiltiy to delete a log as well when no longer relevant.
- As a user, I want the website to be easy to use.
- As a user, I want the process to add / edit / delete product to be easy
- To have an appealing website that a user to track and their products, etc.
- To have a great functionality so the user feels like this website helps them in their day-to-day life.
- To make the website as personal as possible by giving the user the possibility to add information about their product in the profile.
- Easy to navigate by using the few buttons
- Appealing dashboard with a functional overview
- Easy way to add a log to the dashboard
- Easy way to add another product to the profile
- Ability to edit and delete existing logs
- When you have multiple products, it should be easy to navigate between them
- To have a dashboard where all the necessary information is visible
- It should be easy to add another log
- Personalised profile with information about the product and an image
- To be able to filter on the logs in order to get specific information
I have used Coolors to come up with a color scheme that matches the atmosphere of a Ecommerce site. For this website I have deciced to keep design simple, meaning I opted for a white background color with some Orange white for the Home. I have added some color (black) for the buttons, navigation bar is left eith a white background design more visually appealing to the user. The reason for this is that for this project, the functionality is much more important and as there are a lot of functionalities I don't want to distract the user with overwhelming colors.
Like I mentioned before, But all the colors I have used mostlty have followed that of the Ado-Botique project colors that fit well with the feeling of a Ecommerce site. Below I will explain more why I choose the various colors and for what I will be using them.

I have used a contrast checker in order to make sure that the contrast is sufficient. This way my content will be easily readable.
In order to find appropriate fonts for my website, I have visited Google Fonts to explore the various options. For the titles and subtitles, I have used the font Play and for the main text I have used Cormorant Garamond.
I have chosen to use Materialize to create an overall structure for my website. Materialize provides various elements of CSS and Javascript which is very helpful to keep a good structure on your page. The reason why I choose Materiaize is mainly due to the various features they offer like a datepicker, floating action button etc.
Navbar
- The navbar has the search bar implemented so the user can search at all times when required to find the item they want. The users can use keywords that will help with the search.
- The navbar has collapsible options available when selecting different options available e.g. products.
- The navbar is fixed this will be a better user experience when navigation via the website.
- The main site logo links the page back to the home screen if the user wants that option to start from the beginning of the website.
- When the user’s login the dropdown for my account is different on the website e.g. logout view history to register and login.
- The users also see the items in the basket and the amount it’s going to cost so they can keep track of the website.
- If the user selects one of the dropdowns menus, they will have access to the list of options the hover ability has not been implemented for this option to make sure the site is cleaner and the users only get the options they want when selected.
 On mobile devices the navbar is more consolidated and some options are placed into a sidebar menu.
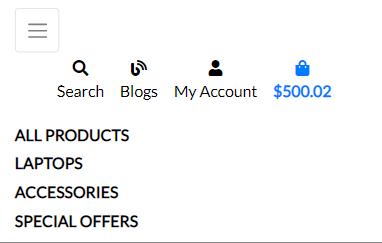

Below the navbar is a promo bar. It contains product sorting dropdown menus and a promotional text; at this time, it is FREE DELIVERY ON ORDERS OVER £50!
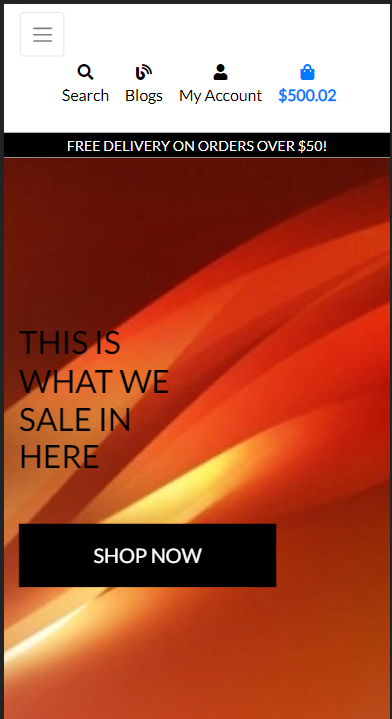
- The home page has a Orange picture for the background available on the website for interest of potential customers and a link that goes to that web page which is a blck button and white text for good attraction.
- Users can select all the options from the drop downs in the nav bar section.
- Contact details have been added for the website if required to get in touch.
- The text adjusts to be full width on mobile devices so the SHOP NOW button is still in view
- The search page displays all products when using keywords associated with the items.
- The search results will display the number of items it has found.
- The products will be displayed as cards, as per the product views.
- For small devices the search icon makes the search input appear so the user can have almost the full width r entering their search terms.

- The product views contain a 'breadcrumbs' list at the top of the page, to improve navigation around the site.
- This allows users to return to the all products view if currently viewing a specific category.
- There is an available sorting button on the website that allows users to display products by price, Rating, Category or All Products.
- The users can action a rating to the product which will implement the rating of the item.
- If the card is selected the image will pull up the product information.
- Number of items in a row is responsive.
- Breadcrumbs has been implemented into the product details view. This will improve the navigation of the website.
- This makes it easier for users to return to the all-products page links and selected criteria
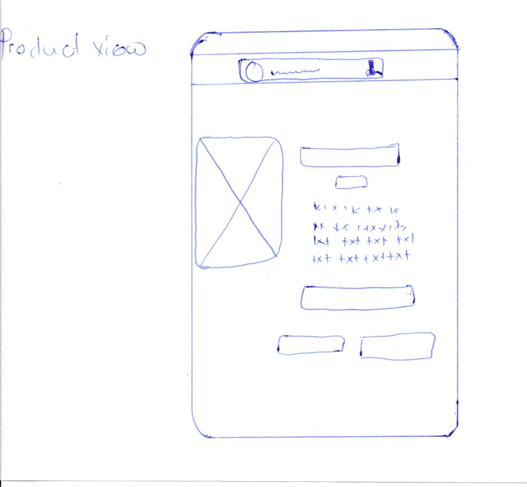
- When the user selects the item all the details are displayed the same for easy reading and navigating purposes.
- The product detail pages show the data from the list page, with the addition of a detailed description.
- A select list to enable users to select the size of product that they wish to purchase.
- The user has the access to return to the whole products page if they choose to use the ‘back’ button on the item page.
- The user can select as many items as they choose with the quantity selector on the
- There is a add to basket button once the user confirms the number of items they want to purchase.
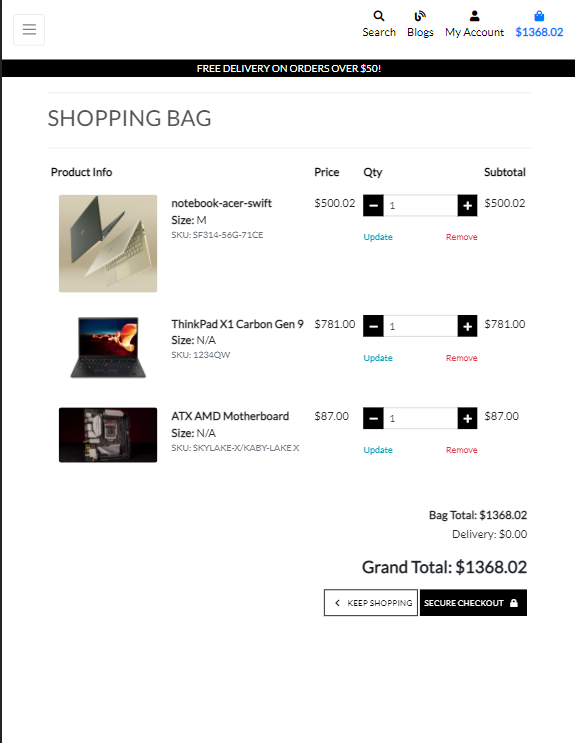
The basket layer appears below the cart icon if a user adds an item to their bag. It summarizes what the user has purchased.
- If there are no products in the bag and the user clicks on the icon, the user will have the option to return to the whole products page.
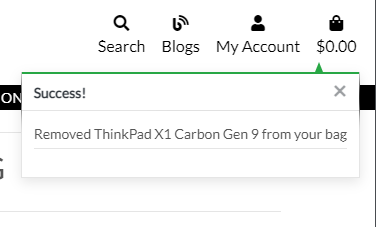
- When an item has been added to the bag the user will get a notification displayed.
- The user will have the item displayed providing the title, cost and quantity on the page
- The bag will provide the user with the total amount of the products accumulated before checking out
- The items will display all the information horizontally
- The quantity the user has added can be edited if required.
- The user can add multiple items of the same product when updated this will notify the user this has been complete with the cost.
- The user can also remove the items from the basket if they no longer wish to purchase the item
- The total cost will be displayed at the bottom of the page with any delivery charges included
- The user can return to the home page with all products at any point even if there are items in the basket.
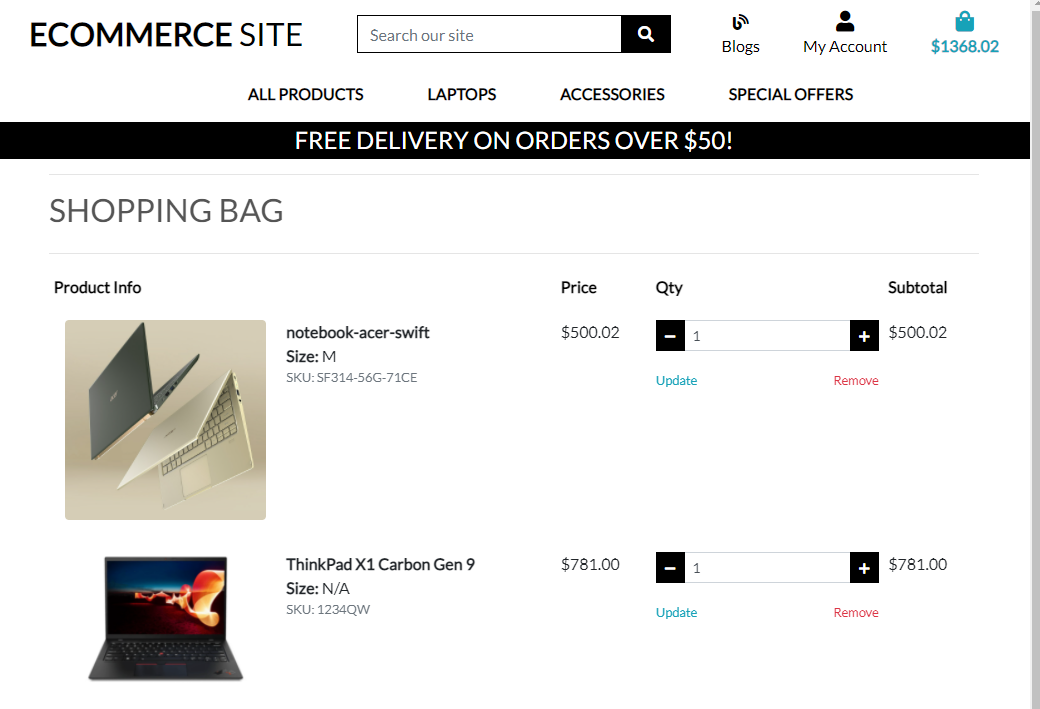
- Checkout page request user contact details when checking out. Name, delivery details and card information.
- The items will display with the product, quantity and total cost
- The user can adjust the webpage if they wish to change the products before finalizing the order
- Users can create an account if they wish to do so by clicking the link available
- Users can login from the checkout page if they haven’t done so already
- There is an order for a user to complete with their details & delivery details (prepopulated if already saved against the user profile).
- The users can finalise the payment using the attached stripe method by inputting the details (Education purposes no money will be taken)
- Once the user has finalized the order, they can return to the products page by clicking the deals button
- Users will get a notification and email to inform them they have purchased the item (education purposes)
Superusers can edit or deleted, and add products due to administration access
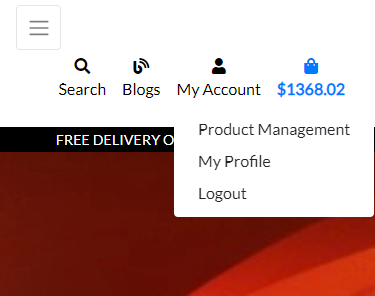
This page is found from an admin only option under the My Account Menu
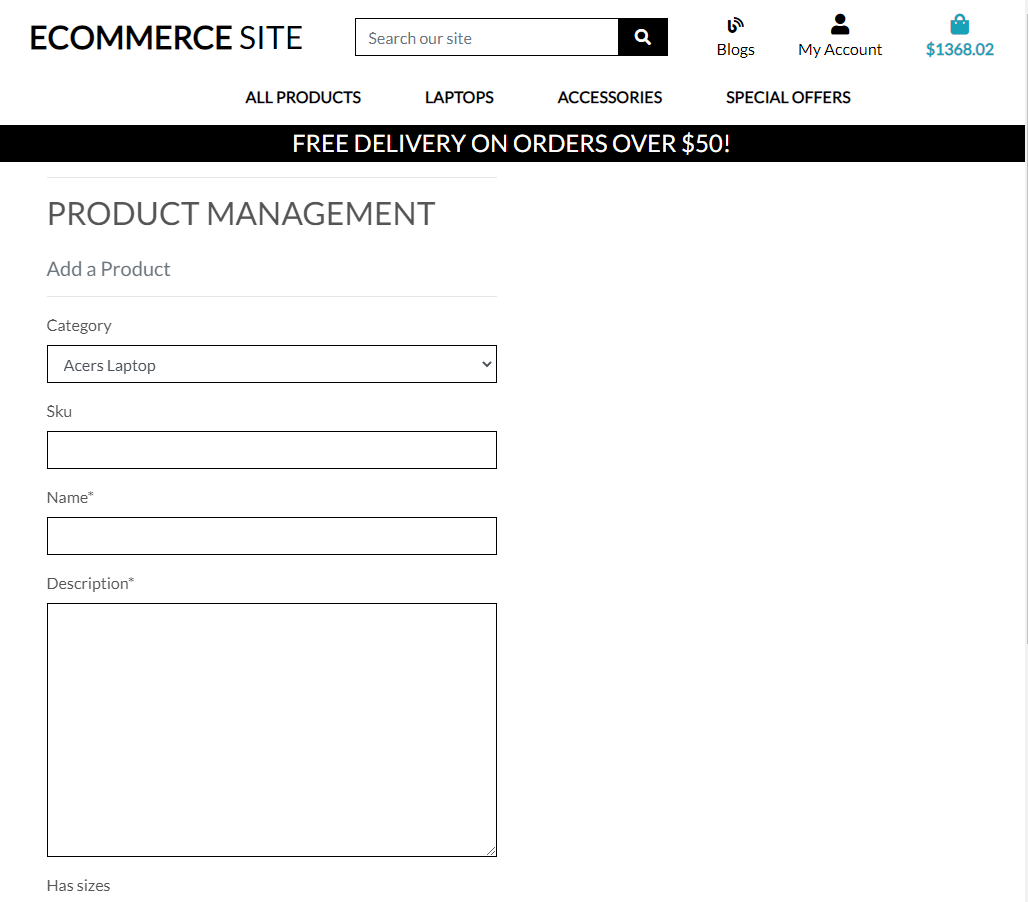
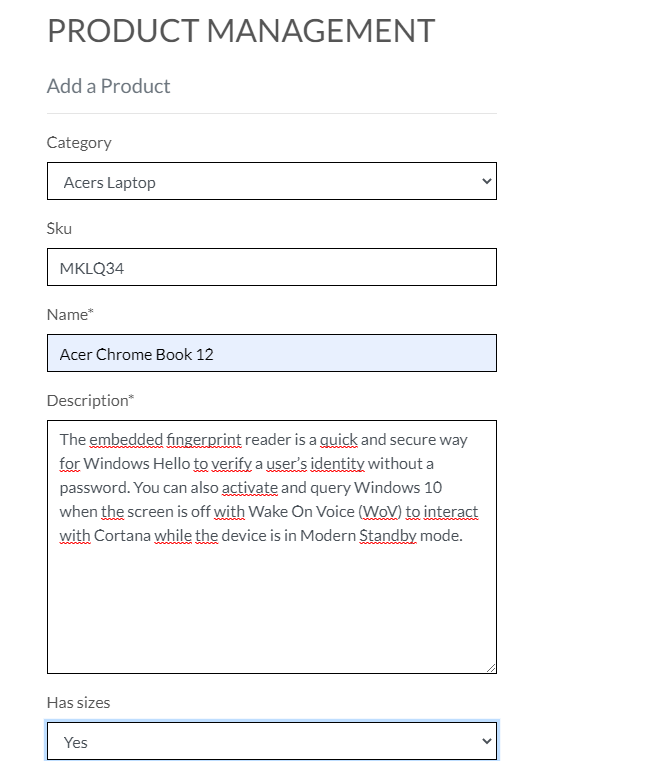
The page has the ability for the user to enter a new product.
The user sets the following fields
-
Category – drop down of existing categories defaulted to first value
-
Sku – option text entry
-
Name – required text entry
-
Description – required text field
-
Has Sizes – drop down defaulted to No
-
Price – required
-
Rating – optional number
-
Image url -optional
-
Image chooser -optional
This page prepopulates the product information form and allows the user to change the product’s data
The delete product button ideally would bring up a warning layer, but right now it only flashes a message
- Registration functionality
- Sign-In and Out functionality
- Add multiple products per user
- CRUD Functions:
- Create: possibility to add various products and logs
- Read: dashboard where you can view the product profile(which was selected) and its logs
- Update: possibility to update the product profile and logs
- Delete: possibility to delete the product profiles and logs
- Search logs by log date
- The user can also insert image url or download it from from his/her computer and also to upload the Image to the cloudaccounts.
- Have a more extensive user profile with, profile image, preferences and email to which you can send updates, newsletters etc.
- Have a 'forget password' functionality.
- Include a confirm password to make sure the user has chosen the password he/she wanted.
- Possibility for the user to be able to add (and remove) products they would like to specificely track for their products like medication etc.
- Add pagination so the list of logs will be display with a max of 20 logs per page.
- When the user has added their first log, I would like to remember the chosen metrics for any futher logs so they don't have to update this every time they add a log.
- This would be done through profile preferences or store the data in a cookie.
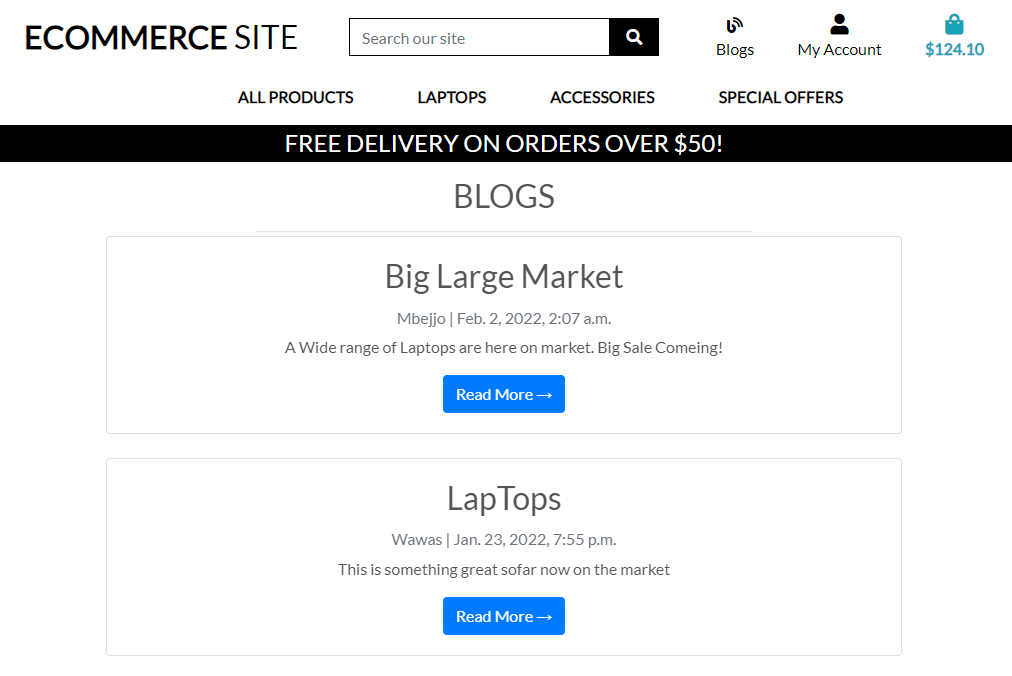
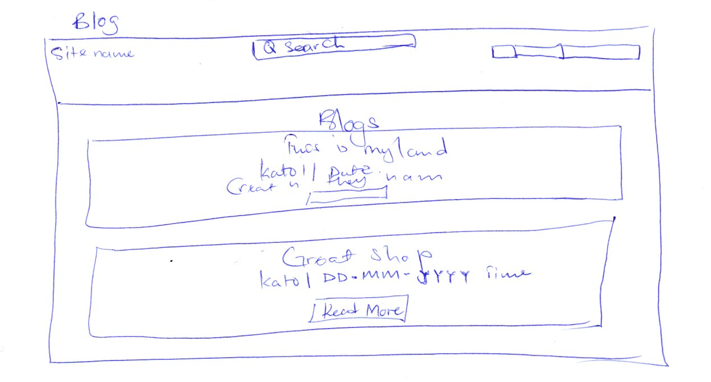
- The blogs page lists out all blogs from most recent to oldest.
- Blogs page has Read more Button that brings user to Post Detail Page.
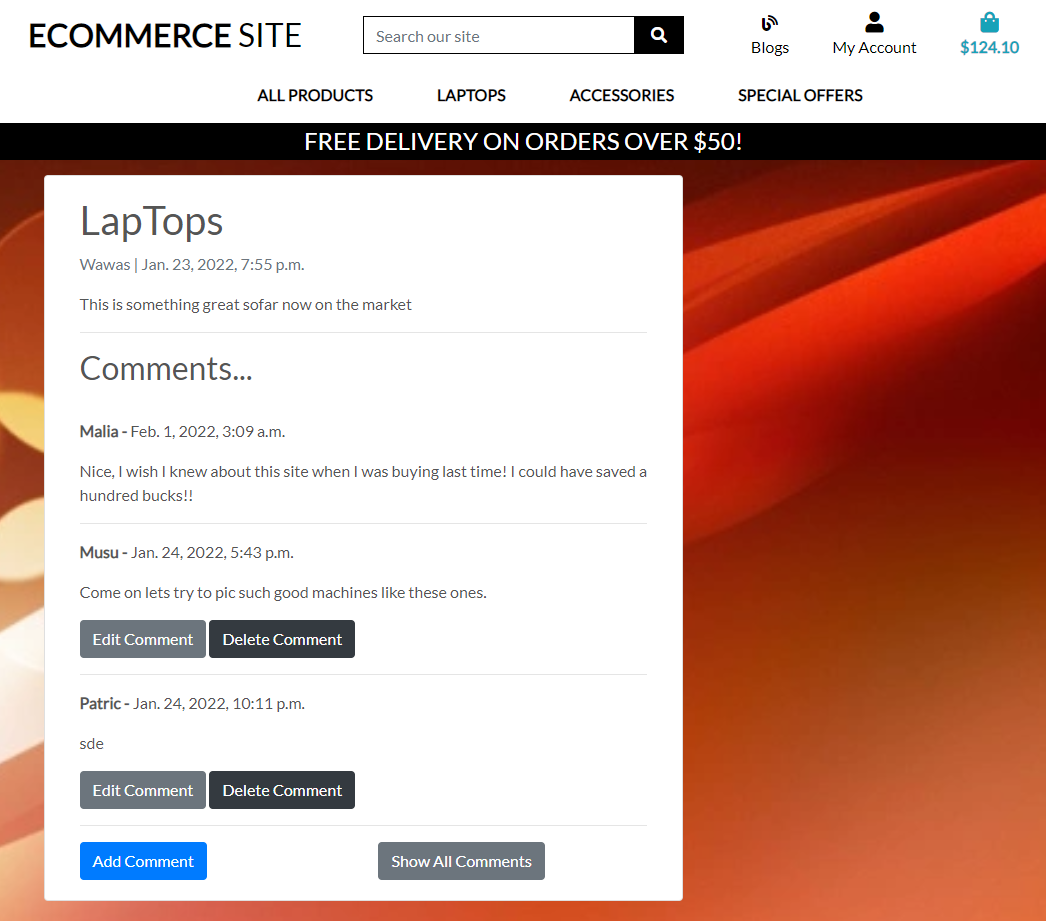
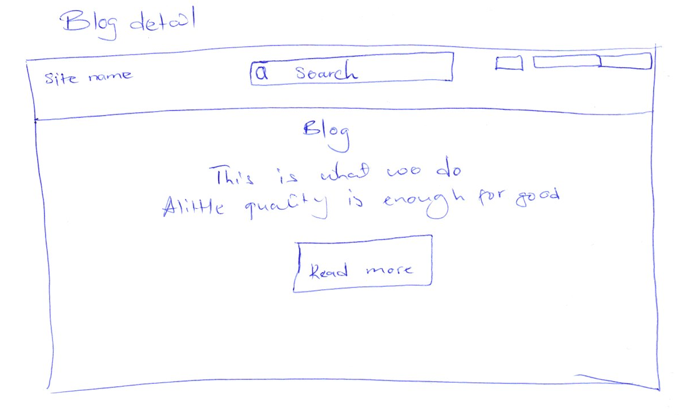
- This page shows the blog details.
- There is a comment section that will list out any comments or just an Add Comment button
- If a user is logged in and has written a comment, they will see an edit comment button
- If a user is the owner of a comment, they can edit their comments
- If there are more than 3 comments a Show all Comments button will be visible so the page isn’t too cluttered.
- Only the admin can edit comments made by unauthenticated users
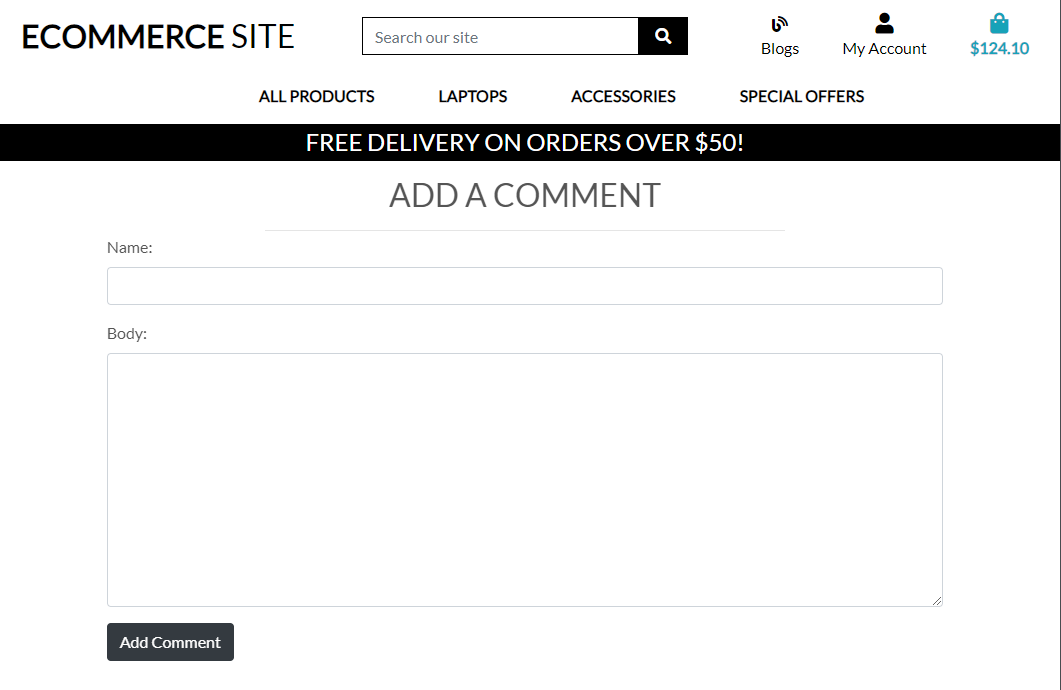
Add comment page can be accessed by any user Collects name of user to attribute the comment to, does not have to be tied to a real user Collects comment from user.
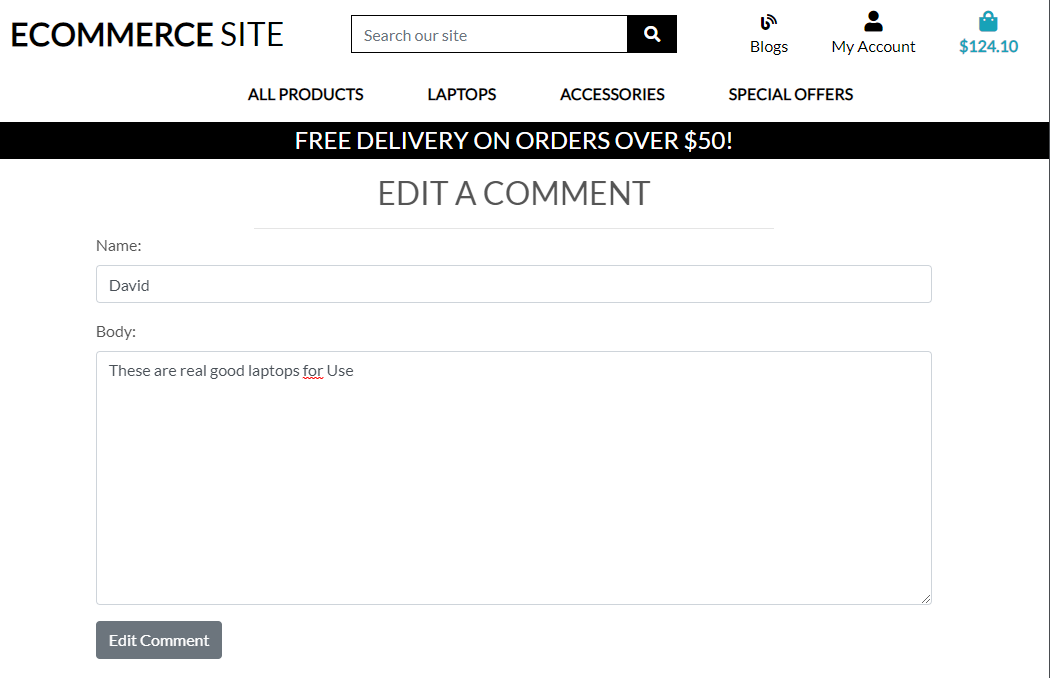
- Edit comment page can be accessed by user that owns the comment
- Prepopulates existing information
- Allows user to update name of user to attribute the comment to, does not have to be tied to a real user
- Allows user to update their comment
- looks good desktop
- looks good tablet landscape
- looks good tablet portrait
- looks good phone portrait
- no console errors
- navigation goes where it should mobile
- navigation goes where it should desktop
- looks good desktop
- looks good tablet landscape
- looks good tablet portrait
- looks good phone portrait
- no console errors
- navigation goes where it should mobile
- navigation goes where it should desktop
- looks good desktop
- looks good tablet landscape
- looks good tablet portrait
- looks good phone portrait
- no console errors
- navigation goes where it should mobile
- navigation goes where it should desktop
- looks good desktop
- looks good tablet landscape
- looks good tablet portrait
- looks good phone portrait
- no console errors
- navigation goes where it should mobile
- navigation goes where it should desktop
- looks good desktop
- looks good tablet landscape
- looks good tablet portrait
- looks good phone portrait
- no console errors
- navigation goes where it should mobile
- navigation goes where it should desktop
- looks good desktop
- looks good tablet landscape
- looks good tablet portrait
- looks good phone portrait
- no console errors
- navigation goes where it should mobile
- navigation goes where it should desktop
- looks good desktop
- looks good tablet landscape
- looks good tablet portrait
- looks good phone portrait
- no console errors
- navigation goes where it should mobile
- navigation goes where it should desktop
- looks good desktop
- looks good tablet landscape
- looks good tablet portrait
- looks good phone portrait
- no console errors
- navigation goes where it should mobile
- navigation goes where it should desktop
- looks good desktop
- looks good tablet landscape
- looks good tablet portrait
- looks good phone portrait
- no console errors
- navigation goes where it should mobile
- navigation goes where it should desktop
- looks good desktop
- looks good tablet landscape
- looks good tablet portrait
- looks good phone portrait
- no console errors
- navigation goes where it should mobile
- navigation goes where it should desktop
- looks good desktop
- looks good tablet landscape
- looks good tablet portrait
- looks good phone portrait
- no console errors
- navigation goes where it should mobile
- navigation goes where it should desktop
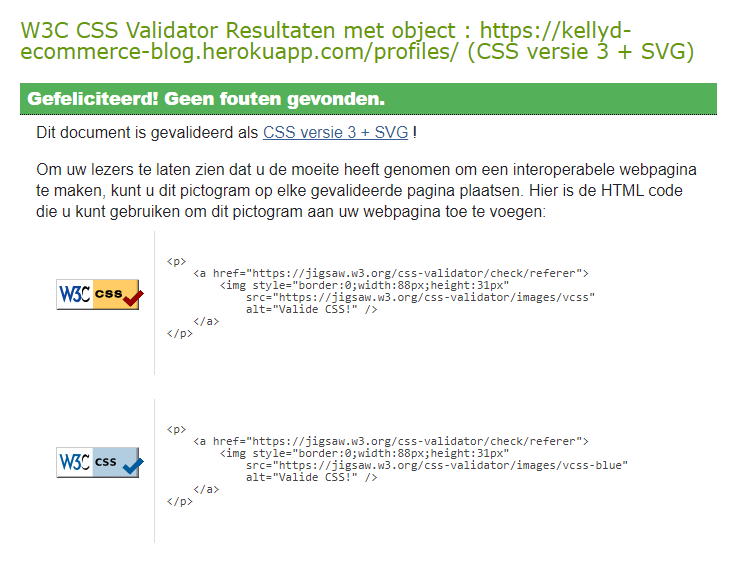
- looks good desktop
- looks good tablet landscape
- looks good tablet portrait
- looks good phone portrait
- no console errors
- navigation goes where it should mobile
- navigation goes where it should desktop
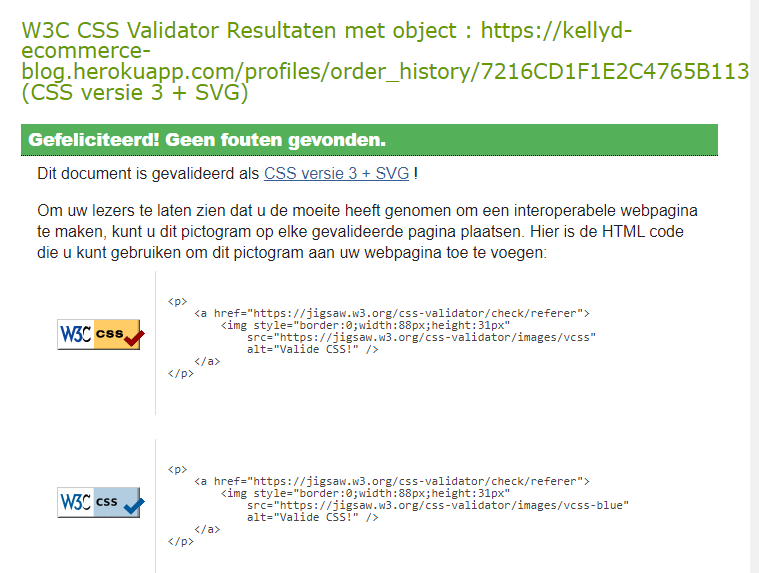
- looks good desktop
- looks good tablet landscape
- looks good tablet portrait
- looks good phone portrait
- no console errors
- navigation goes where it should mobile
- navigation goes where it should desktop
User story: As a user, I would like to be able to register for the website so I can have my personal environment
-
Plan
I want to create a page where the user can register for the personal account to which only the user has access. My first plan was to redirect the user to the form right away to add the first product but I realised it might confuse the user. Therefore after registration, the user will be taken to a "Home page" where the only call-to-action will be to add their first product. This way the user can make 'the decision' to add a item profile themselves and I don't make that choice for them. -
Implementation
I created a form where the user can choose a username and a password. I have used the pattern attribute to only allow certain characters for the username and password. Correct feedback will be displayed whenever the user doesn't meet the pattern critera. Before creating the new account, I will check in the database if the username already exists. If so, correct feedback will be displayed to the user so he can choose another username. Password will be stored with the help of the password generate hash so it is stored safely. After the registration was succesfull, the user will be redirected to the blank dashboard to add their first dog. In case the user wrongfully clicked on register instead of sign-in, a link to the sign-in page is provided so the user doesn't have to go back. I have also implemented a 'Go back to the homepage' link so the user doesn't have to use the back button of the browser in case he/she wants to go back to the homepage. I created the shopping bag where user can store all his items he want. I have used a variable (register) to make the difference between the register and sign-in form. When register is equal to True, I added the span which explains the requested format. By implementing this, I have managed to merge the register and sign-in form into 1 form which simplifies my code. In the bag where the user stores his products, I made it easier for the user to delete and update his products. -
Test
I have tried to create an account with an already existing username. Correct feedback is displayed. Whenever I didn't meet the pattern criteria, the correct feedback was displayed, explaining which charachters etc are allowed. User acccount is created whenever all criteria was met and user is being redirect to blank dashboard.
I noticed that the feedback provided to the user when their input didn't match the required format was not being displayed on all devices. After some research I have decided to add the required pattern right above the input fields so the user will always know which format to use.
After receiving some feedback from friends and family who have tested the website, I have decided to make the feedback message stand out more. It took the user a while to notice the feedback when the username already exists. I have changed the text color to red so it really stands out.
-
Result
Registration form is working as planned and user information is stored safely in the mongodb Users collection. I had a problem adding products to the project, in that I got alot of errors in 403 but by the help of tutors I managed to solve it. Feedback provided stands out nicely to inform the user. Redirection to blank dashboard works as well as planned so the user can choose to add its dog right away. 'Back to homepage' link works as well and takes the user back to the homepage Tested the registration on various browers and devices and the form is responsive and userfriendly. Having the pattern as a fixed element on the page, improved the user experience. Instead of filling in the fields without knowing the pattern, receiving the feedback and then filling in the fields again, the user can now insert right away the fields with the correct pattern. -
Verdict The test has passed all the criteria and works like planned.
User story: As a user, I want to login after I created an account and see my previous inserted information.
-
Plan
My plan is to create a login form where the user can fill in the username and password. After signing in, the user will be redirected to the dashboard where the user can see the previously inserted information. In case the user doesn't have any product added to the profile, the user will be redirected to the blank dashboard where a product profile can be added. -
Implementation
I created a form where the user can fill in its username and password which will be verified with the information stored in the database. I created a form checkout where a user after feeling in information then the user can check out and is confirmed. When the wrong information is being filled in, the correct feedback will be provided to the user. In case the user wrongfully clicked on sign-in instead of register, a link to the register page is provided so the user doesn't have to go back. I have also implemented a 'Button SHOP NOW' where it redirect you to the products page of different kind. -
Test
Signing in with the correct username and password works as planned and the correct dashboard of that user will be displayed. Before it was bringing in error but late going through the code with the tutor it was put to right. When the user fills in the wrong username and/or password, the correct message is being displayed on the screen. Also here the feedback message didn't stand out well enough so I have changed the color to red. Redirecting to register page and 'back to homepage' link works as well. -
Result
Sign-in form is working as planned and the input is being verified correctly with the stored information of the database. Redirection to the correct dashboard works as well as planned so the user can add aproduct to the bag and as well is given a choice of deleting and updating. Tested the sign-in form on various browers and devices and the form is responsive and userfriendly. Feedback provided to the user stands out nicely. -
Verdict
The test has passed all the criteria and works like planned.
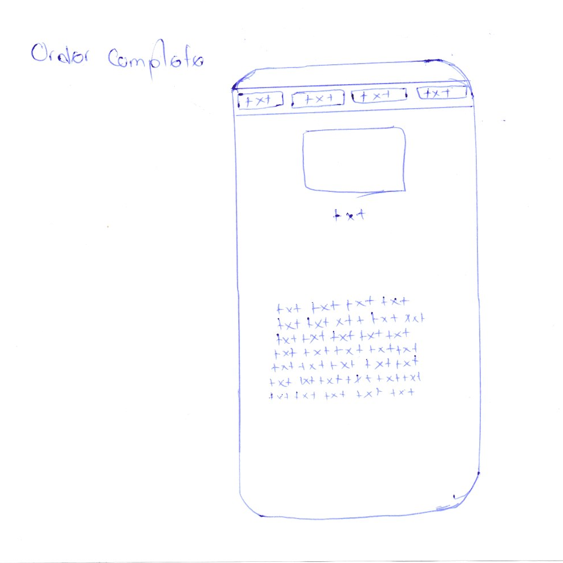
Making my wireframes I just used hand sketch frameworks was perfect for designing the website. Once the idea was there it was just piecing the website together to help see what it could look like. Original method was pen and paper. And I went on using the same to implement in real world If any changes are implemented then I can discuss the changes from the original idea and show how I've improved the design. The designed first draft will have amends and improvements where necessary. This is part of an ongoing improvement idea. This will help when designing making the mods and amends where necessary.
The wireframes created below are in details of each page of the website. There will be some tools showing the admin side but the main focus is the website design. Once the web design pages are working correctly and full functional. The websites will be provided in full and example explained about any changes made to the design if enough time is available. The website images will show evidence of the wireframes compared to the final outlook.
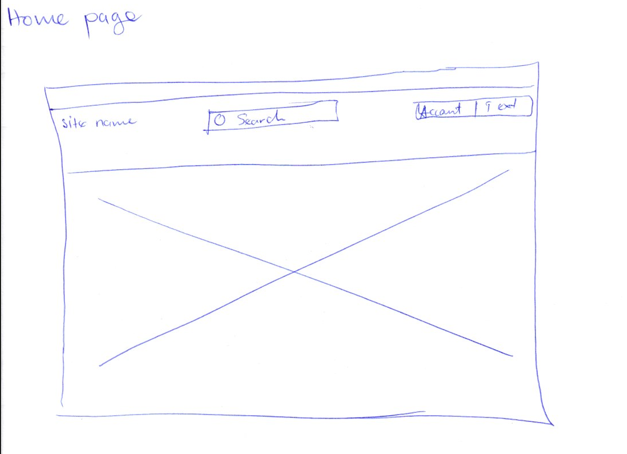
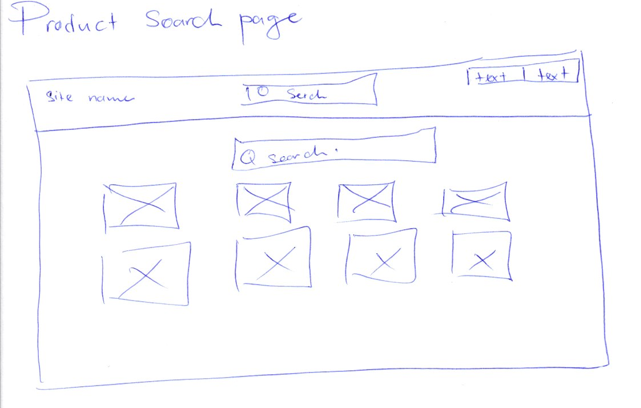
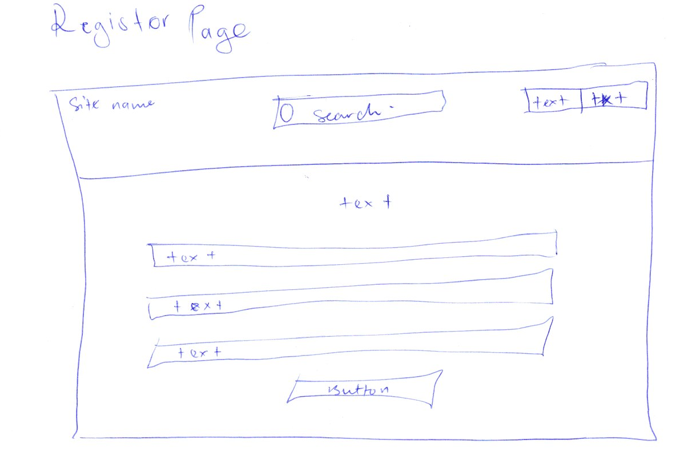
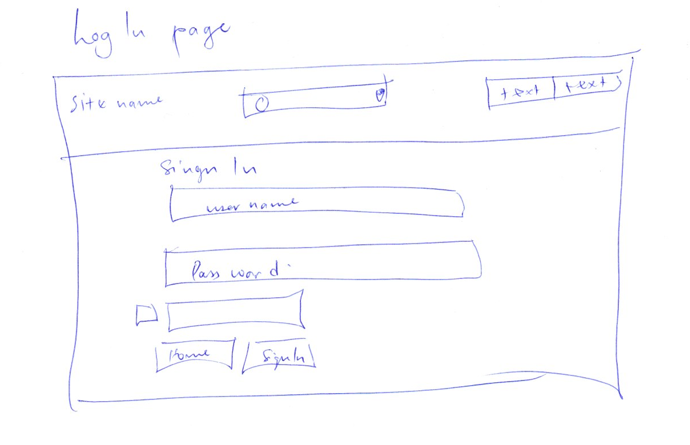
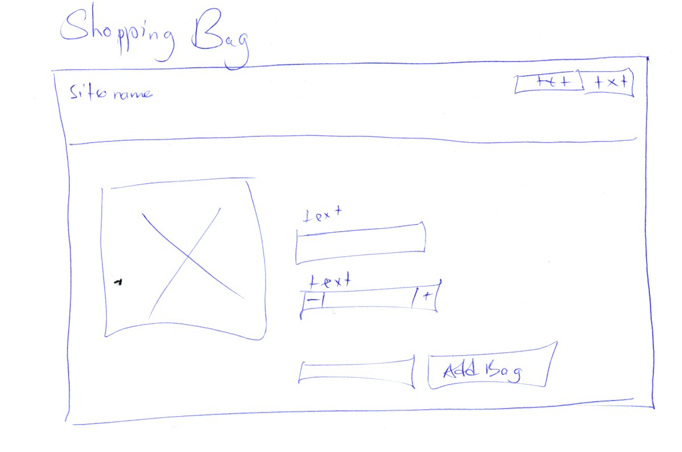
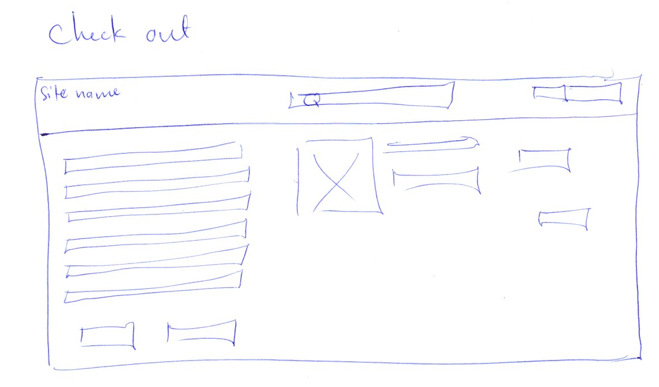
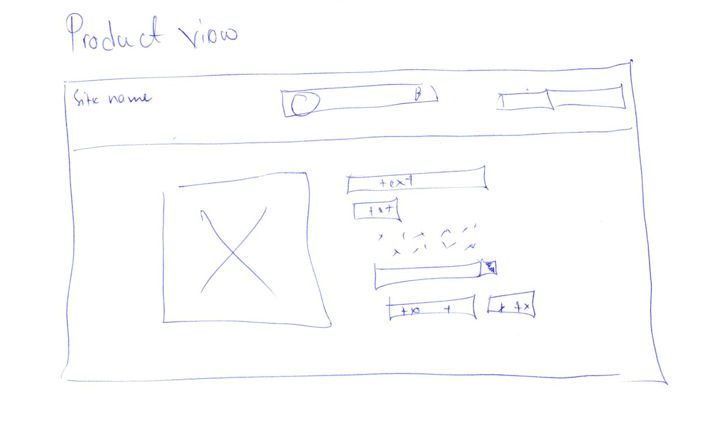
A blog can be imported then the wireframe below will show the layout that would be desired for the blog.
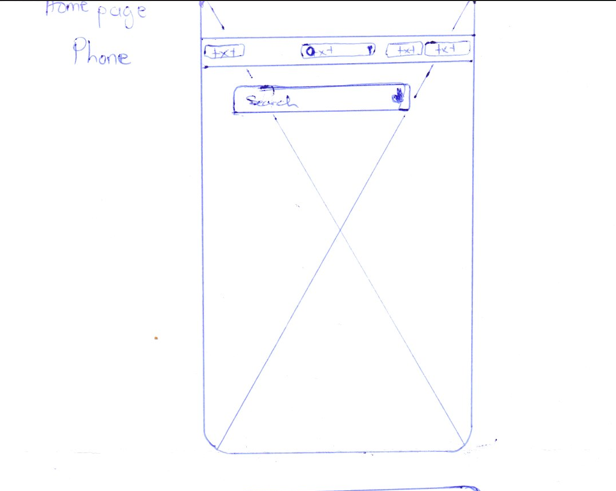
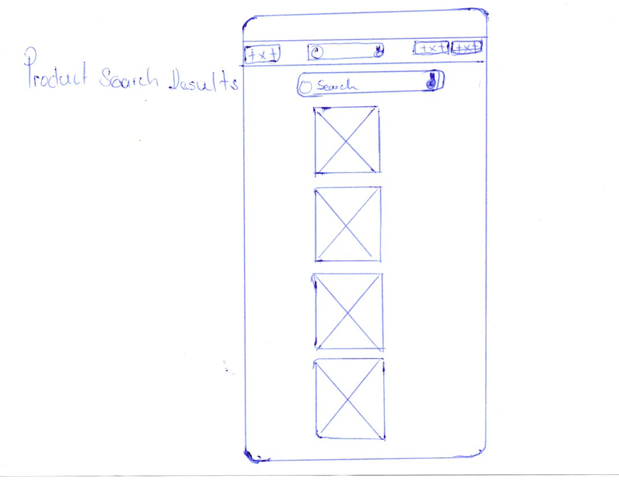
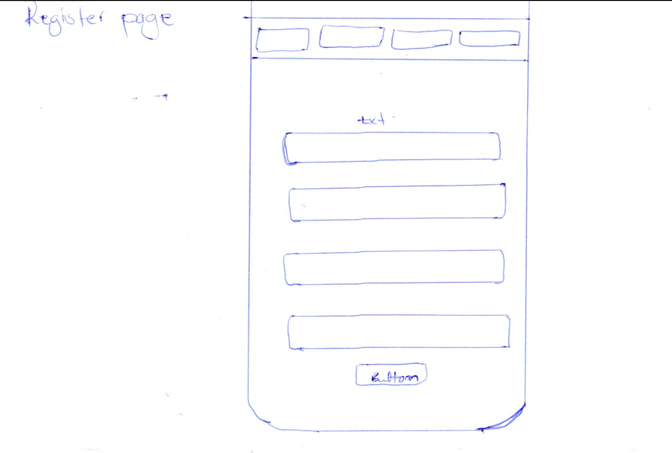
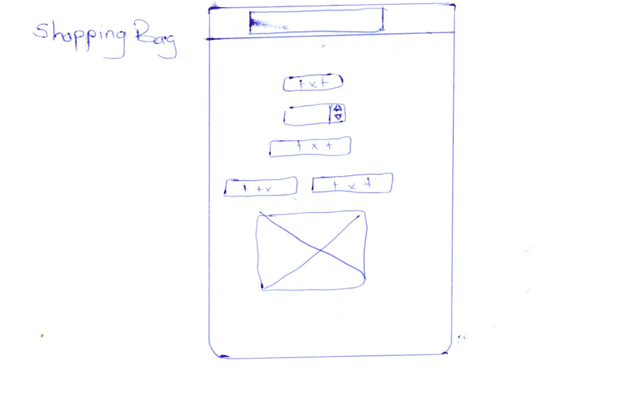
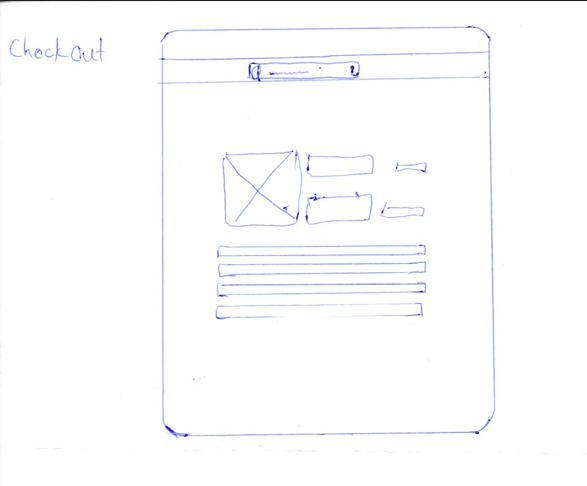
-
Plan
The user should be able to created a profile for the product in which it can fill in various information. Possible input fields should be the name of the product, description and an image of the product. A summary of the ecommerce profile will be displayed on the dashboard overview. -
Implementation I have created a form with the various input fields where the user can fill in the information. I have only made the product_name field required as for the other fields, the user might not want to fill in this information. Some user might not know the date of birth etc so he/she might not want to fill this in. For the image, I worked with an url that has to be filled in. The product image can be easily uploaded by user from its device and/or cloud. The user can also use the AWS web tier to make changes like uploading media file to the project and many more. The user is given a chance to make choice of which item he would buy as wel as the user would be able checkout for the products he has bought.
-
Test
I have tested the add product, signin, signout form various times to make sure they work properly. The input is stored correctly in the product collections.
Shop now button works as planned and takes the user to the page after resolving some issues. See Bugs In order to display the correct product for the user, I have addded the _id of the user as a hidden inputfield for the add product which is stored in the database.
When testing this on mobile devices (iPhoneSE and iPhone8), I noticed that the datepicker was not working how it should. After conducting various reseach, I have come up with solution which you can find under Bugs.
After various testing, I came to the conclusion that it didn't make sense that the user could able to add product profiles with the same name. When the user adds a product, I now first check if the user already has a product profile with that name and the correct feedback is being shown to the user. Implementing this, brought another issue along with the cancel update in case the user has more than 1 product already added to its profile. When the user now wants to create another profile with the same name, receives feedback that the profile already exists and then clicks 'cancel', the user will be taken to the profile for which he/she wanted to create a profile.
-
Result
Adding a profile for the product works as planned and looks good across various browsers and devices.
Upon submitting the form, the input is stored correctly in the database. -
Verdict
The test has passed all the criteria and works like planned.
- Plan
I would like to create a dashboard where the user can see the profile of the products on the navbar. On small devices the profile will be displayed on top of the page with the logs of the products below. Whenever the user has multiple products, I want that the user is able to select the profile that should be displayed on the dashboard. This will be displayed above the product profile on small devices and on top of the dashboard for large screen. The dashboard should be very clear and intuitive to use.
When the user doesn't have any product yet added to its user account, a blank dashboard will be displayed with a very clear call-to-action to add the first product. On the place where normally the logs would show, I will the following text: "After you added your products, come here to start tracking!"
-
Implementation
My dashboard exists out of several of main parts, the search box, my Account and the bag plus the nav links display.Product profile
Here it shows all the submitted information about the product, including the button shop now which gives a personal feeling to the user. When the user hasn't filled in the url, it shows 'Click here to add an image' which takes the user to the products page. Left on top it has a a logo "ECOMMERCE SITE" where the user can click and goes back to the home page. Below the profile it shows an edit button and a delete button. When the user doesn't have a dog added yet, it will display an empty profile with a call-to-action to add a dog profile.Logs display
The logs that will be displayed are from the products profile selected. When no product profile is added yet, here it will show that as soon as they added a dog, they can come here to start tracking. When a product profile is added but no logs are submitted yet, it shows 'Click here or on the add button right below to add your first log" which takes you to the logs page. From the moment the user has at least submitted 1 log, another button will appear above the logs with the following text: Click here to search logs by date'. This will take the user to the search logs page where a search can be performed and updated. For medium devices and up I have included a floating action button which is displayed right below on the screen. Even if the user is in the middle of the screen, the button will be displayed, giving the user the possibility the add a log without having to scroll up to the top. The floating action button will be hidden on small screens and a normal button will appear on below the search button. I have implemented this because the floating action button was appearing on top of the product profile which might have confused the user with the add another product button.Whenever the user has more than 1 product in its bag, a select element will appear above the top right corner of the dashboard saying: "Selected successfully". Here the names of all the product that the user has will be displayed. When the user clicks on the name, the form will be submitted (without submit button, by using javascript) and the profile and logs of that product will be displayed on the dashboard.
-
Test
The correct dashboard is being displayed depending on if the user has already added a product profile. When the dashboard is being displayed after registring and adding the first product profle, the correct profile is being displayed under product profile. Under logs the text to add first log is being displayed correctly.
From the moment the user adds a first log, the log is being displayed nicely on the screen with nice focus on the date to make the dashboard more appealing. The text to add first log disappears and the button to search logs by date appears nicely above the log. When multiple logs have been added, the logs are ordered by log date with the most recent one first.
On small devices the floating action button disappears and a normal button appears right below the search button.
When the user has added more than 1 product, the select box appears above the dashboard, allowing the user to select the profile that should be displayed on the dashboard.
During testing I noticed that the order of logs was not correct. In manage.py I sorted the logs by with the most recent first. This was not going correctly as I had set a different format for the date, with the month written in full. The logs were being sorted incorrectly because of this. See Bugs for the solution to this problem.
I also had a problem of error server 500 which was comming from the base.html template about the add_profile and it was supposed to be profile bt I was helped by the tutor and the credit goes to them I could not fix it however it looks easy.
-
Result
The dashboard looks as planned across various browers and devices. All the functionalities work as planned and the correct information is being displayed on the screen. Hiding the floating action button on small devices works well and improves the user experience. After resolving the issue with the date format, the logs are being sorted correctly. -
Verdict
The test has passed all the criteria and works like planned.
-
Plan
After a while the user will have a lot of logs which will make it more complicated to find a certain log. I want the user to be able to filter on the logs depending on the log date to make it easier find a certain log. In the future I would also like to add pagination to the logs so it doesn't look like an endless list of logs. See Features to be implemented Currently I don't have the required skills or knowledge for this so I will only implement the search function. But this will be for the feature implemented As the log_date is a required field for adding a log, the user will be able to search for all the logs. -
Implementation
As of the moment the user has added at least 1 log for the products profile, a button will appear on top where the user can click to go to the search logs page.
If there was no log found with that logs date, the following message will appear: "There are no logs for this date". After this, the user can either search on another date or return to the dashboard.
The user also has the option to edit or delete a log after searching it. After they edited or deleted the log, the user will be taken back to the dashboard of the relevant product.
- Test
When I implemented the above strategy, I noticed that the logs of other products where showing as well with the same products. In my function I have included the product_id in order to only display the logs of that date of the relevant products. When no logs are found, the correct message is being displayed on the screen. The shop now button to take the user to the product page works as planned and the dashboard of the products for which you were performing the search is being loaded.
When you click a day, it is clear you still have to click search in order to see the results. See Features to be implemented for further explanation.
-
Result
The search logs page works as planned across various browsers and devices. Search function works as planned and return the correct logs or feedback message depending on the user input. Button to take the user back to the relevant dashboard functions as planned. -
Verdict
The test has passed all the criteria and works like planned.
-
Plan
As some users might have multiple product, it is a good user experience that they can have all their dogs under 1 account instead having to create multiple user accounts. On the dashboard under product profile, a button will be dislayed left on top where the user can click to add another product. This will take the user to the add dog page, same page as where the user was redirected to after registering. A cancel button will be displayed in case the user doesn't want to proceed with adding another product. -
Implementation
The form is the same one as when the user created a first product profile. The main difficulty of having multiple product per user, was the display on the dashboard. In the end I have decided to add a select box above the profile whenever the user has more than 1 product added to the profile. In the select box I added a default option with the text: Select the product profile you want to see. The option that the user can choose will depend on the amount of dogs added to the profile, the names of the dogs will be displayed as the value.In order to accomplish the above, I have decidede to add the product_id to the dashboard url. Whenever the user clicks on the product name in the select box, the form will automatically submit (with the help of javascript) and load the dog profile and logs of the selected product. Implementing the above solution meant as well that I had to rewrite a big part of my other functions. This to make sure that everytime there was a redirect to the dashboard, the correct dog_id had to be included.
When the user signs in, the dashboard that will be displayed will be the first one that was loaded in the product collection of the database.
-
Test
After I had implemented the above solution, I had to test all the other functionalities as well to make sure the correct dog profile was being displayed on the dashboard. Whenever the user has more than 1 product, the select box is being displayed with the product names that the user has created. Upon clicking the product name for which the user would like to see the dashboard, the form is submitted and the correct info is being displayed. When the user removes the previously last product (and has only 1 product remaining), the select box disappears and profile of the remaining product is displayed. I made sure that whenever a new log was added, edited or deleted, the dashboard of the relevant product kept on being displayed on the screen.
When testing on other devices (iPhone SE and iPhone8 in this case), we noticed that the select box was not working properly. This is was the same issue as I had for the datepicker. See solution under Bugs
-
Result
Having multiple product on the profile was a big challenge which has taken a lot of time and testing. The functionality is now working as planned across various devices and browsers. The select box appears nicely like planned above the dashboard. -
Verdict
The test has passed all the criteria and works like planned.
User story: As a user, I want to be able to edit the product profile / As a user, I want to have the possibility to edit a log when I made a mistake or want to add some info.
-
Plan
The user has to be able to edit an existing log and dog profile when a mistake was made or when the user wants to add certain information. Here it is important that the information that the user inserted before remains intact and will be displayed on the page in order to have a good user experience. Every log and dog profile will have an edit button which will take the user to the editlog or editprofile screen. -
Implementation
For this functionality I used the same product-form / log-form.
I have used a variable (add) to make the difference between adding and editing a product/log. When add is not equal to True, I added a value attribute with the previous filled in information. By implementing this, I have managed to merge the add and edit form into 1 form which simplifies my code. The value of the input fields will already be filled in with the information that the user has inserted before. When the user submits the form, all the fields will be updated in the relevant collection in the database. In order to make this function work, I had to include the product_id for the edit product profile and the log_id for the edit log profile. This way I made sure that the correct profile or log was updated. -
Test
I have tested the edit functionality various times to make sure the data was being updated correctly. After the submission of the form, the user is being redirected to the dashboard of the product for which the changes were made. Cancel button also takes the user back to the dashboard in case the user doesn't want to proceed with the changes.
I noticed when testing that when the user would edit a product profile and change the product name to an already existing dog profile name, the user would still have 2 product profiles with the same name. Also here I now first check to see if the product name already exists in the database for this user and if so, feedback is provided to the user and the form is not being processed. The user can either choose a different name or cancel to go back to the dashboard. I still ran in quite some difficulties when implementing this. You can find more information in Bugs.
-
Result
The edit functionality works as planned across various browsers and devices. The correct document in the logs or dogs database in being updated and the user is taken back to the relevant dashboard. Cancel button redirects the user correctly to the relevant dashboard. -
Verdict
The test has passed all the criteria and works like planned.
User story: As a user, I want to have the possibiltiy to delete a log as well when no longer relevant.
-
Plan
-
Log
In case the information is no longer relevant, the user should be able to delete a log. There will be a delete button (delete icon) which the user can use. The relevant log will be removed from the database and the user will stay on the relevant dashboard. -
product
The user should be able to delete the product profile, even though there would only be 1product remaning. If the last product has been removed, the user will be taken again to the blank dashboard where the user can decide to add a product. The reason why I created a seperate dashboard for this is because the view dashboard url functions with the user id and the product id, there always needs to be at least 1 product added to the profile. Therefore I created a blank dashboard which doesn't take the product_id as a parameter with the same structure as the view_dashboard. When the user still has multiple product and deletes a profile, the dashboard of the (one of the) remaining product(s) will be displayed.
-
-
Implementation
I have added the delete button to every log, next to the edit button. I have worked with self explanatory icons which improves the overall look of the dashboard. When the user clicks on the button, the log with the relevant log_id will be removed from the database and is being redirected to the correct dashboard. Below each product profile, the same delete icon is being displayed. -
Test
When the delete button for the log is clicked, the relevant log is being removed and the user stays on the relevant dashboard. When delete button of the product profile has been clicked, the relevant product is being removed from the database. When user removes last product, the user being redirect to the blank_dashboard. When the user has multiple product in its profile and removes 1, user is redirected to view_dashboard of (one of) the remaining product(s).While I was testing the delete functionality, I realised that by deleting a complete dog profile or a log, you will lose all the profile info / log info. To make sure that the user doesn't click the delete button by accident, I have included a modal to confirm that the user would like to proceed with deleting the product profile / log.
-
Result
The delete funtionality works as planned across various browsers and devices. The modal opens up when the button is clicked asking the user if they are sure they would like to delete the profile / log. When no is selected, the user is taken back the dashboard. When yes, the product_profile or log is deleted from the database. The delete button for the product profile is correctly being displayed and works as planned. -
Verdict
The test has passed all the criteria and works like planned.
-
Plan
As soon as the user is logged in, an icon with a dropdown will appear on the right side of the navbar. When clicking on the icon, the dropdown with log out will appear. When the button is clicked, the user will be logged out of its account and be redirected to the home page of the website. -
Implementation
I have added a dropdown with an icon in the navbar when the user is logged in. The log out dropdown will appear below the account icon by setting the coverTrigger to false in script.js. When the user clicks the button, it will remove the user_id from the session and the user will be redirected to the homepage. -
Test
When clicking the button, the user is being logged out and the home.html is being loaded. I have tested this functionality on each page where logging out is possible. -
Result
Log out function workes as planned across various devices and browsers. -
Verdict
The test has passed all the criteria and works like planned.
-
Bug
When the user opens the add another product (already having at least one product under its account), a button is provided to the user in case he doesn't want to proceed. This button was set up like my other 'cancel' buttons with an anchor link that takes the user back to the dashboard.To add another product, you will not 'send' a product_id in the url but only the user_id. The product_id will be created when the user has added the product. To load the view_dashboard, you need a user_id AND a product_id in order to display the dashboard of a certain product. This was not working as the product_id will not be generated in case the add product was cancelled.
When the user would add a product, coming from the blank dashboard there was no issue as the blank dashboard doesn't require a product_id. Here I could just implement my redirect to the blank dashboard function.
-
Fix
After some research on how to approach this, I have decided to use the javascript window.history.back() which resolved the issue. This might not be the best solution for this problem but it resolves the bug and takes the user back to the dashboard of product who was displayed on the screen before. -
Verdict
Cancel add product button is now working as planned.
Dashboard of first product of the user is always displaying after updating/remove logs for other product profile
-
Bug
When I had multiple products added to a user account and I wanted to add/edit a log or edit the product profile, the user was redirected to the dashboard. Instead of displaying the dashboard of the productfor which you just performed a change, the dashboard of the first product from the user in the collection was being displayed. -
Fix
In order to have this resolved, I have decided to include the product_id in the dashboard url and add a hidden field in the forms that takes the product_id. The dog_id would be posted along with the other fields and stored in the database. For the dashboard view, I would then use that id to display the profile of the product for which the change was made. -
Verdict
The fix resolved the issue and the dashboard of the product for which the change was made is being shown after submitting the form.
-
Bug
When I had multiple user accounts which had products with the same name, often the information like logs, profile description etc of the product with the same name from another user account was being displayed. I needed to make sure that only the data of the product of the relevant user account is being displayed. -
Fix
I noticed that in some of my functions, I only used product_name in order to find certain data. By adding the user_id to the find function, I have managed to only get the information of the product of that user. This change had to be made in the view_dashboard function as well as in the product function. -
Verdict
The fix resolved the bug and only the data of the product of the relevant user is being displayed on the dashboard.
-
Bug
I had implemented a floating action button on the dashboard which allowed the user to click the add log button wherever the user was situated on the screen. This was used to prevent that the user had to scroll back to the top in order to add a log. However when I was testing this implementation I noticed that on mobile devices, it was working rather confusing. As the display of the product_profile takes up full view height, the floating action button was being displayed on top of the product_profile. The user might have gotten confused the add log button with the add product button which is not good for user experience. -
Fix
My first idea was to only show the floating action button as off the moment the user scrolled down to the logs section but I was unable to implemented this. As a result, I have decided to hide the floating action button on small devices and added a fixed button right under the search button where the user can click to add a log. -
Verdict
It doesn't give the same user experience as the floating action button on medium and large devices but it still provides a better user experience than the floating action button being displayed on top of the product profile.
-
Bug
When the user only has 1 product left under its account, the user was still able to delete the profile which resulted in an error. This was caused by the dashboard needing a product_id in order to display the dashboard. As it was the last product of the user being deleted, there was no product that could be displayed. -
Fix
My first idea here was to disable the remove button when there was only 1 product profile left. After I implemented this idea, I was still not 100% satisfied with the fix as I think the user should be able to delete the last product on its profile. Instead I have enabled to delete button again when there is only 1 product remaining and when the lastproduct has been removed, the user is being redirected to the blank_dashboard. Here the user can see a very simple dashboard where the only call-to-action is to add a productprofile. On the add product page I have changed to heading depending on if the user already has a productor not. If yes, the heading will display 'Add another product to your profile' and when not 'Add a product profile to start tracking'. For this fix to work, I added an if statement in my delete productfunction to check the amount of products that the user has in its account. -
Verdict
I think that my second approach to this issue is a better solution than the first. Especially when thinking about the user experience. I'm satisfied with the fix and the user is now able to remove their product profile, even if there is only 1 remaining.
-
Bug
After various testing, I noticed that the order of my logs was not correct. Logs of November were only being displayed after the ones of October for example. -
Fix After some research, I figured out it was due to the date format that I set in script.js. The date was being sorted in app.py in reversed order, but as my months were written in full, the was being sorted alphabetically reversed. To resolve this, I have change the format so the months will be written in numbers as well. As on my dashboard, for visual impact, I wanted to keep on working with the full months, I have implemented another function in javascript. This function loops through the log_months and sets the innerText depending on which month.
-
Verdict I can imagine there might be a better solution for this but the above fix resolved the issue of the sorting while being able to keep my original design for the dashboard.
-
Bug I wanted to make the field of log_date required as a log without a date doesn't make a lot of sense. The required attribute was not working as planned, allowing the user to add a log without a log date.
-
Fix As I have disabled manual input by adding the read-only attribute, the required attribute didn't work anymore. I have found a way around to still not allow manual input but through javascript instead of the read-only attribute.
-
Verdict It is now working as planned. Manual input is disabled while the input is still required for the user.
-
Bug As a user shouldn't have 2 product profiles with the same name, I implemented a function that verifies if the name already exists and doesn't allow to add the product with that name to the database. When the user wants to edit the product profile and tries to change the name to an already existing product_profile, it shouldn't be possible. This was working but due to this, the user was not able to submit any other changes to the profile becasuse the name already existed in the database which makes sense.
-
Fix I now check first if the product_name of the form matches with the product_name in the database, in that case, the user can proceed with the update. If not, I check if the new product_name from the form already exists in the database of the user, if yes, feedback to the user is being displayed that a profile already exists for this product. If the name doesn't exists, the user can proceed with update. In order to prevent the user making a profile with the same name but all small letters instead of capitalized, I have stored the product_name in lowercase in the database.
-
Verdict User is not able to add a product profile if the product_name already exists while he/she is still able to update the product_profile and change the name as long as it doesn't exist yet for that user. Satisfied with the result and works now as planned.
-
Bug
I noticed that in some cases where the internet speed is not optimal that my style.css has a small delay in loading after the css of Materialize. This results in the colors of Materialize showing for a split second before the colors of style.css are loaded. -
Verdict I have double checked if I placed my links in my head element in the correct order which is the case. For now no concrete solution yet but more research will be done on this and be updated in future releases.
I have created the ECOMMERCE SITE project using Github, from there I used Gitpod to write my code. Then I used commits to git followed by "git push" to my GitHub repository. I've deployed this project to Heroku and used "git push heroku master" to make sure my pushes to GitHub were also made to Heroku. I connected the checkout form to stripe for payment to ensure the the payment is secure and safe. Then after I had to create an account in AWS environment where by I could upload my file easier by creating the bucket folder. This project can be ran locally by following the following steps: ( I used Gitpod for development, so the following steps will be specific to Gitpod. You will need to adjust them depending on your IDE. You can find more information about installing packages using pip and virtual environments here
To clone the project:
-
From the application's repository, click the "code" button and download the zip of the repository. Alternatively, you can clone the repository using the following line in your terminal:
git clone https://github.com/David-Gyavi/E-commerce_Blog.gitIf you plan on pushing this application to a public repository, ensure that env.py is added to your .gitignore file.
-
The application can now be run locally. In your terminal, type the following command
python3 manage.py runserver.
-
Login to your Heroku account and create a new app. Choose your region.
-
Ensure the Procfile and requirements.txt files exist are present and up-to-date in your local repository.
Requirements:pip3 freeze --local > requirements.txtProcfile:
echo web: python3 manage.py runserver > Procfile -
The Procfile should contain the following line:
web: python3 manage.py runserver -
Scroll down to "deployment method"-section. Choose "Github" for automatic deployment.
-
From the inputs below, make sure your github user is selected, and then enter the name for your repo. Click "search". When it finds the repo, click the "connect" button.
-
Scroll back up and click "settings". Scroll down and click "Reveal config vars". Set up the same variables as in your env.py (IP, PORT, SECRET_KEY, MONGO_URI and MONGODB_NAME): !You shouldn't set the DEBUG variable in under config vars, only in your env.py to prevent DEBUG being active on live website.
SECRET_KEY = YOUR_SECRET_KEY AWS_ACCESS_KEY_ID = YOUR_AWS_ACCESS_KEY_ID AWS_SECRET_ACCESS_KEY = YOUR_AWS_SECRET_ACCESS_KEY DATABASE_URL = YOUR_DATABASE_URL SECRET_KEY = YOUR_SECRET_KEY STRIPE_PUBLIC_KEY = YOUR_STRIPE_PUBLIC_KEY STRIPE_SCRET_KEY = YOUR_STRIPE_SCRET_KEY STRIPE_WH_SECRET = YOUR_STRIPE_WH_SECRET USE_AWS = YOUR_USE_AWS -
Scroll back up and click "Deploy". Scroll down and click "Enable automatic deployment".
-
Just beneath, click "Deploy branch". Heroku will now start building the app. When the build is complete, click "view app" to open it.
-
In order to commit your changes to the branch, use git push to push your changes.
-
I have used google for the pictures publicly available Google for the product images that I have used for my homescreen.
-
While I was developing this website, I ran into some difficulties that I didn't know how to tackle. I want to thank the Stackoverflow community for making their useful content available online.
-
I would like to thank my mentor Malia Malia for his endless support and guiding me into becomming a better developer!
-
Last but not least, I would also like to thank the code institute tutors for the help they rendered to me tutors It has really helped me to improve my website and make sure it has an overall good user experience.